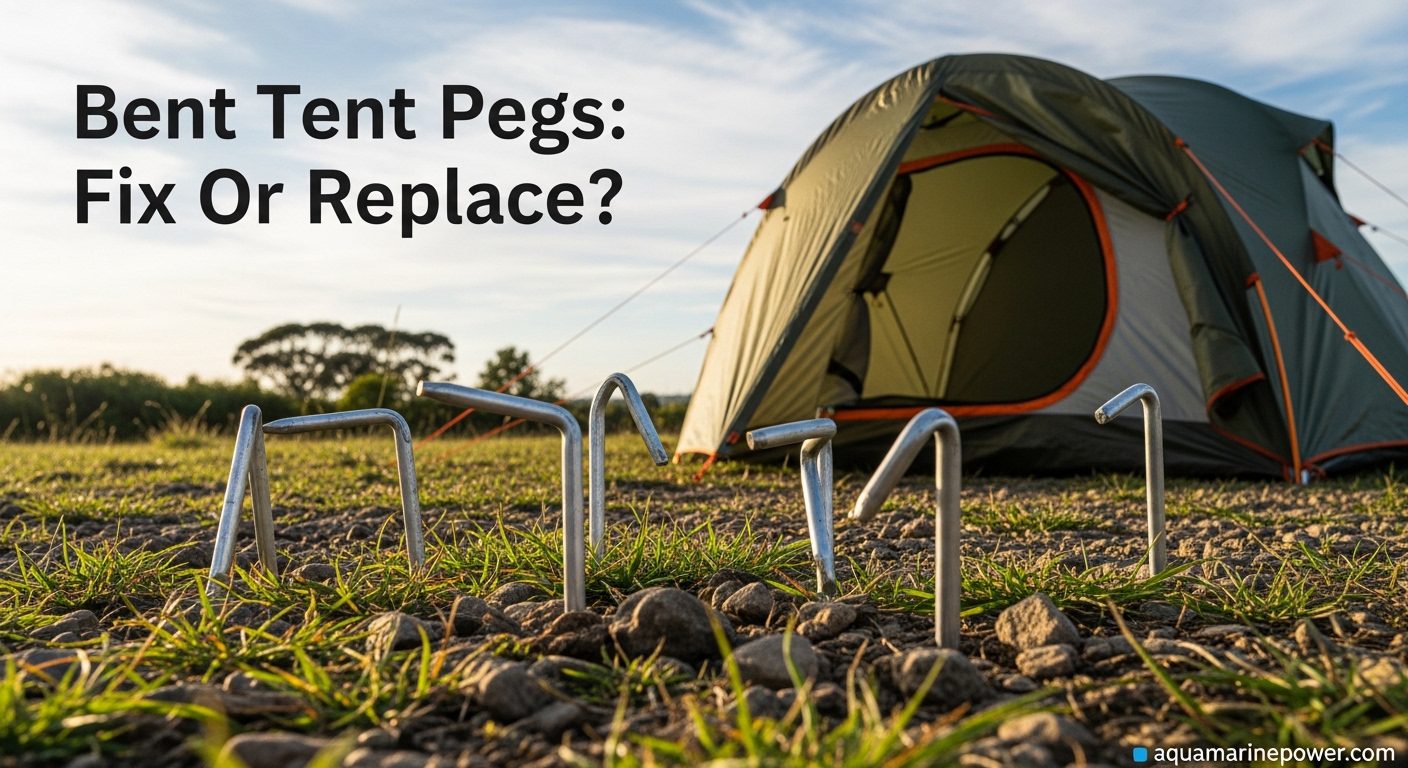
You’re wrestling with a tent full of slack lines and discover half your stakes are bent at awkward angles. After 15 years of camping across everything from soft Carolina soil to rocky Colorado terrain, I’ve seen this scenario play out more times than I can count. Bent tent pegs are one of the most common frustrations campers face, but most people toss them without realizing they can often be saved.
Yes, you can fix bent tent pegs in most cases. The success depends on the peg material, severity of the bend, and whether the metal has developed fatigue cracks. Aluminum pegs can typically be straightened 2-3 times before becoming too weak, while steel pegs can often be bent back into shape multiple times without issues.
I’ve personally salvaged dozens of pegs over the years, saving myself hundreds of dollars in replacement costs. Once you learn the proper techniques, you’ll rarely need to throw away a bent stake again. Let me walk you through everything you need to know about assessing, fixing, and preventing bent tent pegs.
Understanding Why Tent Pegs Bend
Tent pegs bend due to ground hardness, improper hammering technique, and insufficient peg strength for the conditions. Rocky soil and frozen ground are the most common culprits for bent stakes.
- Most Common Cause: Hitting rocks or roots beneath the surface
- Prevention: Choose the right peg type for your ground conditions
Every bent peg tells a story about what happened underneath the soil surface. When I was camping in Zion National Park last [cy], I watched my friend drive a standard aluminum peg straight into what turned out to be a buried rock. The peg curled like a ribbon, creating that classic J-shape that every camper recognizes immediately.
The physics are straightforward. When your hammer strikes the peg, force transfers down the shaft until it hits resistance. Soft soil absorbs this energy gradually. Hard surfaces like rocks or compacted clay resist suddenly, causing the metal to deform where it can’t penetrate further. The thinner the peg and the harder the obstacle, the more dramatic the bend.
Different materials respond differently to stress. Aluminum 7075-T6, the most common tent peg material, is strong but becomes brittle after repeated bending. Steel pegs are more forgiving but heavier. Titanium offers an excellent strength-to-weight ratio but can be unforgiving when hammered incorrectly. I’ve seen campers destroy $15 titanium pegs in a single strike by using improper technique.
Ground conditions change everything. Beach camping might seem easy, but sand creates poor holding power, causing you to drive pegs deeper than intended. Forest camping looks ideal until you hit the network of roots just inches below the surface. Mountain camping often involves rocky or frozen soil that destroys lightweight stakes. I’ve learned to always check what’s beneath the surface before committing to a peg location.
Should You Fix or Replace Bent Tent Pegs?
Quick Decision Guide: Fix aluminum pegs with minor bends (under 30 degrees). Replace pegs with cracks, kinks, or sharp bends. Steel pegs are almost always worth fixing. Titanium pegs should be inspected carefully for stress marks.
Not every bent peg deserves a second chance. After years of field testing various repair attempts, I’ve developed a simple assessment framework that saves time and prevents potential gear failures. The decision comes down to three factors: material type, bend severity, and visible damage.
Start with a close visual inspection. Hold the peg up to light and look for hairline cracks, especially near the bend point. These fractures indicate metal fatigue that no amount of straightening can fix. I once tried to salvage a cracked aluminum peg only to have it snap in half during the next camping trip. Now I immediately discard any peg showing visible stress fractures.
The bend angle matters too. Gentle curves up to 30 degrees usually straighten easily. Severe bends approaching 90 degrees, especially if they create a sharp crease rather than a smooth arc, have likely compromised the metal’s structural integrity. I’ve found that pegs with kinks or sharp bends tend to fail at the same weak point when reused.
Consider the intended use after repair. A straightened peg might work fine for mild conditions in your backyard, but I wouldn’t trust it for high-wind exposure or critical anchor points. When car camping where weight isn’t an issue, I’ll sometimes keep a straightened peg as a backup. For backpacking trips where every stake needs to perform reliably, damaged pegs get replaced.
Material plays a huge role in the repair decision. Steel stakes almost always warrant fixing because the metal is more ductile and forgiving. Aluminum requires more careful consideration—each straightening weakens it slightly. Titanium pegs are expensive enough that repair attempts make sense, but they require gentle handling to avoid creating new stress points.
How to Straighten Bent Tent Pegs?
The right tools make peg straightening significantly easier and more successful. I keep a small repair kit in my gear box that has saved me countless times. You don’t need specialized equipment—most of what you need is probably already in your home or camp gear.
Tools You’ll Need
Essential Tools: Vise or gripping pliers, hammer (rubber mallet preferred), flat surface, and protective gloves. Optional helpful tools include a bench block, adjustable wrench, and metal file for smoothing sharp edges.
A bench vise is ideal if you have access to one. It provides stable, controlled pressure that lets you work the metal back into shape gradually. If you’re camping or don’t own a vise, locking pliers (Vise-Grips) work as a portable alternative. I’ve used both successfully, though the vise gives better control for severe bends.
Your choice of hammer matters more than you might think. A rubber mallet or dead-blow hammer absorbs some impact energy, reducing the risk of creating new damage points. A standard claw hammer works in a pinch but requires more careful technique. I avoid using heavy sledgehammers—they tend to overcorrect and create new bends in opposite directions.
A solid work surface is crucial. A workbench is ideal, but I’ve used rocks, tree stumps, and even the tailgate of my truck when camping. The key is stability—whatever surface you use shouldn’t flex or wobble under pressure. A piece of scrap wood between your hammer and the peg can help distribute force more evenly.
Basic Straightening Technique
Start by cleaning the peg. Dirt and grime can hide small cracks that would make repair pointless. I run a quick visual check under good lighting before attempting any repair. If the peg passes inspection, clamp it securely in your vise or with locking pliers at the point just below the bend.
Apply gradual pressure rather than sudden force. Think of it as persuading the metal back into shape rather than forcing it. I start with gentle hand pressure, watching to see how the metal responds. If the bend is slight, this might be enough. For more severe bends, I use my hammer with light taps, working progressively harder as needed.
Work the bend gradually from multiple angles. Most pegs don’t bend in a perfect plane, so you’ll need to adjust from different directions. I’ve found that rotating the peg in the vise and approaching from 2-3 different angles produces the straightest results. Patience here prevents creating new stress points in the metal.
Check your progress frequently. Remove the peg from the vise and test it against a flat surface or roll it on a table to see where it’s still deviating. I usually need 3-4 rounds of clamping, adjusting, and checking before getting a peg truly straight again. Rushing this step is the most common cause of failed repairs.
Material-Specific Considerations
Aluminum pegs require the most care. This metal work-hardens as you bend it, becoming more brittle with each adjustment. I apply minimal force and make multiple small corrections rather than trying to fix an aluminum peg in one dramatic bend. If you feel resistance increasing dramatically during the process, the metal may be approaching its breaking point.
Steel pegs are the most forgiving. The metal is more ductile and can handle repeated straightening without significant weakening. I’ve saved the same steel peg 5-6 times over its life, though I do retire them eventually. Steel is also less likely to develop stress fractures, though you should still check for cracks before repairing.
Titanium demands a balance of persistence and caution. The metal is strong but can develop invisible stress points that lead to sudden failure. I use gentle pressure and stop immediately if I feel unusual resistance. Titanium pegs are expensive enough to justify repair attempts, but not so expensive that I risk my tent’s stability on a compromised stake.
Plastic pegs are a different story entirely. Most plastic stakes can’t be effectively straightened once bent—the material has a memory and tends to deform further when you try to fix it. I’ve had limited success warming plastic pegs in hot water and gently reshaping, but the results are rarely reliable enough for critical applications.
Emergency Repairs While Camping
Sometimes you discover bent pegs in the middle of a camping trip with no access to proper tools. I’ve been there multiple times, usually at the end of a long day when the last thing I want to deal with gear repairs. Over the years, I’ve developed several field techniques that can get you through the night.
The rock-and-hammer method is crude but surprisingly effective. Find a flat rock with a slight depression or crack that can grip your peg. Place the bent section over this natural vise and use another rock as your hammer. I’ve successfully straightened aluminum pegs this way, though it takes more patience than using proper tools. The key is finding just the right rock—something heavy enough to deliver force but not so heavy that you lose control.
Tree trunks make excellent improvised vises. Find a tree with natural bark crevices or use the space between two closely growing trees. I’ve wedged bent pegs into these natural gripping points and applied leverage using a sturdy branch. This method works particularly well for pegs bent near the top where you can get good purchase with your improvised tools.
When straightening isn’t an option, sometimes you can compensate instead. A slightly bent peg can still function if you adjust your staking strategy. Drive it into the ground at an angle that counteracts the bend, or use it for less critical anchor points rather than your main guy lines. I’ve camped many nights using a mix of straightened and compromised pegs, positioning each according to its remaining strength.
Your tent stake bag might contain useful repair tools. Many campers carry a small mallet for driving pegs—this can double as a straightening tool. I’ve also used the hook from a tent stake puller to gain leverage on bent sections. Creativity matters more than having the perfect tool when you’re miles from the nearest hardware store.
Some bends can’t be fixed in the field, and that’s okay. If a peg is severely damaged, focus on making the rest of your stakeout system work. Redistribute guy lines, use natural anchors like trees or rocks, or improvise with available materials. I once used a combination of rocks, buried logs, and the few good pegs I had left to secure my tent through a windy night. It wasn’t pretty, but it worked.
How to Prevent Tent Pegs from Bending?
Prevention beats repair every time. After replacing countless pegs over my camping career, I’ve learned that most damage is avoidable with the right techniques and equipment. A little forethought saves both money and frustration down the road.
Start by choosing pegs appropriate for your conditions. Standard aluminum shepherd’s hooks work fine in loose soil but fail in rocky terrain. I keep multiple peg types in my gear box and select based on where I’m camping. Heavy-duty steel pegs for hard ground, wider profile pegs for sand, and lightweight aluminum only when I know the soil will be cooperative.
Probe before you drive. I learned this lesson after destroying three pegs in one weekend. Before hammering, use your stake or a stick to feel what’s beneath the surface. A few seconds of probing can reveal rocks, roots, or hardpan that would destroy your pegs. I tap the ground gently first—if it feels like I’m hitting concrete, I move to a different spot.
Your hammering technique matters more than most people realize. Let the weight of the hammer do the work rather than using excessive force. I hold my hammer near the end of the handle for maximum leverage and use smooth, controlled strikes. Wild, frantic hammering doesn’t drive pegs faster—it just increases the chance of damage when you hit an obstacle.
Drive pegs straight. Angled strikes create uneven pressure that can bend or twist the stake. I align my hammer blows carefully with the peg’s axis, checking periodically that it’s going in straight. If you feel resistance increase suddenly, stop immediately and investigate before continuing. That sudden resistance is usually a rock or root that will bend your peg if you keep hammering.
Consider your tent’s guy line configuration. Over-tightened lines create enormous force on pegs, especially in wind. I tension my lines just enough to stabilize the tent without creating extreme stress on the stakes. During particularly windy conditions, I add extra pegs or use stronger anchors rather than stressing a single point to its limit.
Proper storage extends peg life significantly. I clean and inspect my pegs after every trip, removing dirt and checking for damage. Storing them in a dedicated bag rather than loose in my gear bin prevents dings and dents that can create weak points. I’ve had pegs last 10+ years with basic care, while neglected ones often fail within a season.
Choosing Replacement Tent Pegs
Sometimes replacement is the right choice. Whether your pegs are beyond repair or you’re looking to upgrade, selecting the right replacements prevents future bending issues. I’ve tested dozens of peg types over the years, and the differences in performance are substantial.
For general camping, I recommend upgrading from the basic pegs that come with most tents. Factory-included pegs are typically the minimum viable option—lightweight but not particularly durable. After my third trip replacing bent stock pegs, I invested in a set of quality aftermarket stakes and haven’t looked back. The initial cost pays for itself quickly in reduced replacements.
Ground-specific pegs make a huge difference. Sand and snow require wide, flat profiles that resist pulling out. Rocky terrain calls for heavy-duty steel or titanium with thick shafts. I keep a variety pack in my camping bin so I’m always prepared for whatever conditions I encounter. The right peg for the conditions rarely bends if used correctly.
Consider your camping style when upgrading. Backpackers need lightweight options and might accept some bending as the cost of low weight. Car campers can carry heavier, more durable pegs that virtually never fail. Be honest about how you camp—there’s no point in carrying ultralight titanium pegs if you’re car camping five minutes from home.
Buy extra pegs. No matter how careful you are, some will get lost, bent, or left behind. I keep a stash of 5-10 spare pegs in my gear bin and throw a few extras in my tent bag before every trip. This practice has saved me multiple times, particularly after discovering missing pegs when setting up camp in the dark.
Frequently Asked Questions
Can you fix bent aluminum tent pegs?
Yes, aluminum pegs can be straightened if the bend is minor and there are no visible cracks. Use gentle pressure and work the metal back gradually. However, aluminum work-hardens with each bend, so avoid straightening the same peg multiple times. Discard aluminum pegs that show signs of stress fractures or have been bent severely.
Are bent tent pegs safe to use?
It depends on the severity of the bend and whether the metal has been weakened. Slightly bent pegs without cracks are generally safe for mild conditions. Severely bent pegs or those with visible damage should not be trusted for critical anchor points, especially in windy weather. When in doubt, replace rather than risk tent failure during your trip.
How do you get a bent tent peg out of the ground?
Use a tent stake puller or a curved tool to grip the peg below ground level. Rock it gently back and forth to loosen the soil rather than pulling straight up. If the bent portion prevents your tool from gripping, dig around the peg to expose more shaft. Never pull the guy line forcefully—this can damage your tent and usually doesn’t work on bent pegs.
Why do my tent pegs keep bending?
Repeated bending usually indicates mismatched pegs for your ground conditions. Lightweight aluminum pegs bend easily in rocky or hard-packed soil. Consider upgrading to steel or titanium for difficult terrain, or use wider-profile pegs that distribute force better. Also check your hammering technique—excessive force increases damage risk.
Should I replace bent tent pegs or straighten them?
Replace pegs with cracks, sharp kinks, or severe bends over 45 degrees. Straighten pegs with gentle curves and no visible damage. Steel pegs are almost always worth straightening, while aluminum requires more careful consideration. Consider your intended use—straightened pegs work for backup stakes but may not be reliable for primary anchors in challenging conditions.
What type of tent pegs bend the least?
Heavy-duty steel pegs are the most resistant to bending, followed by thick titanium stakes. MSR Groundhog and similar Y-shaped pegs resist bending better than traditional shepherd’s hooks due to their profile. For rocky or hard ground, choose thick steel or titanium with a diameter of at least 8mm. Ultralight aluminum pegs bend most easily and should be reserved for soft soil conditions.
The Bottom Line
Bent tent pegs aren’t necessarily trash. With the right assessment and technique, most can be salvaged and returned to service, saving you money and reducing waste. The key is knowing which pegs are worth fixing and which should be replaced.
- Always Check: Look for cracks and stress marks before attempting any repair.
- Use Gradual Pressure: Work the metal slowly rather than forcing it back into shape.
- Know When to Quit: Some pegs can’t be saved, and that’s okay.
- Prevent Future Damage: Choose the right pegs for your ground conditions and use proper hammering technique.
The next time you pull a bent stake from the ground, take a minute to assess it before tossing it in the trash. With a little effort and the right approach, you might extend that peg’s life by several more seasons.