MEDICAL DISCLAIMER: This article provides general first aid information for educational purposes only. It is not a substitute for professional medical advice. If you have diabetes, circulation problems, or signs of infection, seek medical attention immediately.
You're three miles into a hike and you feel it—that hot, stinging sensation on your heel that tells you a blister is forming. Every step sends a sharp reminder through your foot. The question running through your mind: Should you pop it now and get relief, or leave it alone and suffer through?
The general rule is NOT to pop a blister while hiking because the intact skin provides a natural barrier against infection. However, you SHOULD drain a blister if it's painful, large, or located in a high-friction area that prevents you from walking comfortably. If you must drain it, always use a sterile needle, clean the area thoroughly, and cover with antibiotic ointment and a bandage.
I've learned this lesson the hard way. After ignoring a developing blister on a 12-mile trek in the Smokies, what started as a minor irritation ended my hike two days early. The fluid-filled pocket eventually ruptured on its own—mid-stream crossing, of course—and led to an infection that kept me off the trail for three weeks.
That experience taught me that understanding when to intervene versus when to let your body heal is crucial for any hiker. Let me break down exactly how to make the right call.
The Short Answer: Generally No, But Sometimes Yes
Most medical authorities agree that leaving a blister intact is the safest approach. The fluid inside creates a sterile cushion that protects the raw skin beneath while it heals. Your body is pretty smart—sometimes you should let it do its thing.
But hiking introduces unique challenges. Unlike walking around your house, you're putting repetitive stress on the exact same spot for hours. A painful blister can change your gait, which creates new problems in your knees, hips, and ankles. I've seen hikers develop knee pain simply from walking weirdly to avoid a heel blister.
The decision comes down to weighing infection risk against ongoing tissue damage. Here's how to decide.
When to Leave a Blister Alone?
Leave the blister intact if it's small, not painful, and you can protect it from further friction. The skin over the blister is your best defense against bacteria entering the wound.
Quick Summary: Small, painless blisters should be left alone. Cover them with a blister pad or moleskin donut and continue hiking. They typically heal within 3-5 days without intervention.
I treat small blisters like minor inconveniences rather than emergencies. On a week-long backpacking trip on the AT, I developed a tiny blister on my pinky toe. Instead of draining it, I applied a moleskin patch and adjusted my lacing to reduce pressure. Three days later, the fluid had reabsorbed and I never missed a step.
Also never pop a blood blister. The dark fluid indicates damage to blood vessels, and draining increases infection risk significantly. These need professional medical evaluation.
When You Should Drain a Blister?
You should drain a hiking blister if it's larger than a nickel, painful enough to affect your gait, or located in a high-friction area (heel, toe, ball of foot) where continued rubbing will likely cause it to rupture anyway.
- Best For: Large, painful blisters on weight-bearing areas
- Limit: Never drain blood blisters or if you have diabetes
On a descent of Mount Washington, I developed a blister on my heel that was the size of a quarter. Every step was excruciating, and I was still four miles from the trailhead. At that point, the decision was clear—continued walking would cause it to burst anyway, likely in an uncontrolled manner.
Draining it properly allowed me to hike out without further damage. The key is doing it right, which brings us to the procedure.
How to Safely Pop and Treat a Blister?
Quick Summary: Sterilize a needle with alcohol or flame, clean the area, make several small punctures at the blister edge, drain gently, apply antibiotic ointment, and cover with a non-stick dressing.
Follow this exact procedure. Skipping steps increases infection risk dramatically.
Supplies needed:
- Alcohol wipes or hand sanitizer
- Sterile needle (or safety pin/needle sterilized in flame)
- Antibiotic ointment (Neosporin or similar)
- Sterile gauze or antiseptic wipes
- Non-stick dressing or blister bandage
- Medical tape or adhesive blister pad
Step-by-step procedure:
- Clean your hands and the area. Use hand sanitizer or wash with soap and water. Clean the blister area with an antiseptic wipe or alcohol pad.
- Sterilize your instrument. If you don't have a sterile needle from a first aid kit, hold a sewing needle or safety pin in a flame for 10-15 seconds until red hot, then let it cool. Wipe with alcohol if available.
- Make small punctures at the edge. Don't stick the needle in the center. Instead, make 2-3 tiny holes at the blister's edge where fluid can drain out. This preserves the skin flap as a protective cover.
- Drain gently. Apply light pressure with clean gauze to help fluid escape. Don't force it—if fluid doesn't come out easily, make another small hole.
- Leave the skin flap intact. Never peel off the loose skin. It's your body's natural bandage and will protect the raw skin underneath.
- Apply antibiotic ointment. This helps prevent infection and keeps the dressing from sticking. A thin layer is sufficient.
- Cover properly. Use a non-stick pad or hydrocolloid blister bandage. Secure with medical tape or adhesive. Change daily or sooner if wet or dirty.
What If a Blister Pops On Its Own?
Sometimes nature makes the decision for you. If a blister bursts spontaneously while you're hiking, don't panic—but do act quickly.
First, stop hiking as soon as possible. Find a clean spot to sit and assess the damage. If the skin flap is still attached, leave it in place. Gently clean the area with clean water (from your hydration pack or filtered source) and antiseptic if you have it.
Apply antibiotic ointment immediately. This is one situation where I carry a small tube of Neosporin in my first aid kit specifically for blister emergencies. Cover with a non-stick dressing and secure it well—road surfaces and trail dirt are notorious for infecting open foot wounds.
If the skin flap has torn off completely, you're dealing with an open wound. Clean extra thoroughly, apply ointment, and consider getting off the trail sooner rather than later to monitor for infection.
Blister Aftercare and Healing
Most properly treated blisters heal within 3-7 days. The key is keeping them clean and protected during that time.
Serous Fluid: The clear fluid that fills blisters is called serous fluid. It's a protective cushion containing plasma that helps separate skin layers while protecting the raw tissue beneath. Draining it is safe when done properly.
For popped blisters, change the dressing at least once daily or whenever it gets wet or dirty. This is especially important on multi-day hikes where sweat, stream crossings, and trail dust create a perfect storm for infection.
I learned this lesson on a rainy three-day section of the John Muir Trail. After draining a heel blister, I failed to change my dressing that evening because I was tired. By morning, the area was red and angry-looking. I ended up taking a zero day to let it heal properly, which cost me 15 miles of progress.
Watch for infection signs: increasing redness, warmth, swelling, pus, or red streaks spreading from the area. Fever is a serious sign—get off the trail and seek medical care immediately.
Infection Warning Signs
WARNING: Seek Medical Care If You Notice
Area feels hot
Yellow pus discharge
Red streaks
Fever over 100.4°F
Essential Blister Care Products for Hikers
Having the right supplies in your pack makes all the difference. I've spent $150+ over the years on various blister treatments, and some are worth every penny while others are gimmicks.
Here's what I actually carry on every hike now.
1. Adventure Medical Kits Blister Medic Kit - Complete Trail Solution
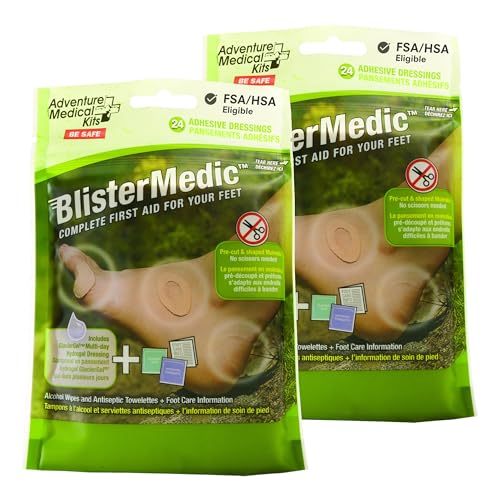
Adventure Medical Kits Blister Medic Kit
Type: Complete blister kit
Contents: Moleskin, antiseptic, bandages
Quantity: 2 pack
Best for: Trail first aid
What we like
- Everything in one pouch
- Water-resistant packaging
- Proven treatments
- Lightweight at 1oz each
What could be better
- Limited quantity of supplies
- No hydrocolloid patches
- Small scissors
This kit earns a permanent spot in my pack because it covers all the basics without forcing me to buy individual supplies and piece them together. At just one ounce each, carrying two adds virtually no weight but provides complete blister treatment capability for multi-day hikes.
The moleskin patches are pre-cut into common shapes, which saves time on the trail. I've used this exact kit to treat hot spots before they became blisters on multiple occasions, including a 20-mile day hike where my boots were rubbing my ankles wrong.
What I appreciate most is that the packaging is designed for trail use. The zippered pouch keeps everything organized and dry, even when I'm sweating through a steep climb or caught in an afternoon thunderstorm.
Packability: Each kit fits in the palm of your hand, smaller than a smartphone
For day hikers, one kit is plenty. For backpackers, I recommend carrying two—especially on longer trips where resupply isn't an option. The peace of mind is worth the minimal weight penalty.
2. DANISH ENDURANCE Merino Wool Hiking Socks - Prevention First
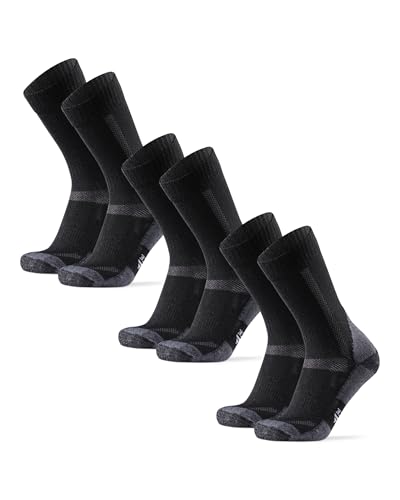
DANISH ENDURANCE Merino Wool Hiking Socks
Material: Merino wool blend
Features: Moisture-wicking, cushioned
Quantity: 3 pairs
Best for: Blister prevention
What we like
- Excellent moisture management
- Cushioned sole
- Seamless toe design
- Breathable merino blend
What could be better
- Merino requires careful washing
- Sizing can run tight
- Not the cheapest option
The best blister treatment is prevention, and these socks have dramatically reduced my blister incidence over the past two hiking seasons. Since switching to merino wool socks exclusively, I've gone from getting blisters on half my hikes to maybe one minor hot spot per season.
The science here is solid—merino wool naturally wicks moisture away from your skin, regulates temperature, and resists odor buildup. Wet skin is soft skin, and soft skin is blister-prone skin. These socks keep your feet drier than cotton or synthetic alternatives.
Merino Blend
Wicking
Reinforced Sole
I particularly like the seamless toe construction. Many blisters form at the toe seam where fabric bunches and rubs. Danish Endurance eliminated this problem area entirely with their smooth linking method.
At three pairs per pack, the value is solid. I keep one pair for hiking, one for camp, and one as backup. The merino content (75%) is high enough to get the benefits without the crazy price tag of some premium brands.
After a 14-mile hike through Rocky Mountain National Park last 2026, my feet came out dry and comfortable—the exact same conditions that would have left me with multiple blisters in my old cotton socks.
3. Dr. Frederick's Original Better Blister Bandages - Budget Treatment

Dr. Frederick's Original Better Blister Bandages
Type: Hydrocolloid bandages
Quantity: 12 count
Features: Water resistant
Best for: Active treatment
What we like
- Hydrocolloid technology
- Water-resistant design
- 40% extra cushioning
- Variety of sizes
What could be better
- Adhesion varies
- Can be tricky to apply
- Not for severe blisters
Hydrocolloid bandages are a game-changer for blister treatment, and these offer solid performance at a price that won't break the bank. The technology creates a moist healing environment while protecting from friction—essentially mimicking what the intact blister fluid does naturally.
I keep a pack of these in every first aid kit I own. They're especially useful for after a blister has been drained or when one has already popped. The hydrocolloid material absorbs fluid while maintaining a protective barrier, which speeds healing significantly.
The variety pack includes different sizes for heels, toes, and general foot areas. This flexibility matters because heel blisters require different coverage than toe blisters. Having options means better fit and better protection.
What sets these apart is the 40% extra cushioning claim. In my experience, this isn't marketing fluff—the pads genuinely provide a noticeable buffer between your tender skin and the relentless rubbing of hiking boots.
I will say that adhesion can be inconsistent, especially in wet conditions. On a rainy hike in the Olympics, one of these fell off after about four hours. Make sure the skin is clean and dry before applying, and consider using medical tape around the edges for critical situations.
At a fraction of the cost of some premium brands, these are perfect for hikers who go through supplies regularly or who want to stock multiple first aid kits without spending a fortune.
How to Prevent Blisters While Hiking?
The best blister treatment is never getting one in the first place. Prevention is far easier than treatment, especially on multi-day hikes where foot problems can compound.
Start with proper footwear. Your boots should fit snugly but not tightly. I always buy hiking shoes in the afternoon—feet swell throughout the day, and a morning fitting can feel like a vise by 3 PM. Break in new footwear gradually before attempting any serious distance.
Choose the right socks. Merino wool is my top recommendation, as discussed above. Avoid cotton entirely—it holds moisture against your skin and is a primary cause of friction blisters. Some hikers use a two-sock system: a thin synthetic liner under a thicker wool outer sock. The layers rub against each other instead of your skin.
Address hot spots immediately. A hot spot is that warning sensation before a full blister forms. When you feel one, stop right then and address it. Apply moleskin, adjust your lacing, or change your socks. Taking five minutes now can save you days of pain later.
Hot Spot: A hot spot is a pre-blister warning sign—an area of skin that feels warm, tender, or irritated. It's your body telling you that friction is damaging skin cells. Treating hot spots immediately prevents 90% of blisters.
Manage foot moisture. Change socks at lunch breaks on long hikes. Consider foot powder if your feet run sweaty. Stream crossings? Change into dry socks afterward. Wet skin is soft skin, and soft skin blisters easily.
Adjust your lacing technique. Too tight and your feet can't swell naturally; too loose and your foot slides around. I use a heel-lock lacing pattern that secures my foot without crushing my toes. Experiment with different techniques to find what works for your foot shape.
Consider preventative taping. If you know you're prone to blisters in specific spots, apply moleskin or tape before you start hiking. This is common practice among thru-hikers who have identified their problem areas over thousands of miles.
Hiking with an Existing Blister
Can you hike with a blister? Yes, but with conditions. The blister needs to be properly treated and protected. Don't just grit your teeth and push through—that's how minor problems become major ones.
If you're dealing with a painful blister mid-hike, consider your options. Are you close to the trailhead? Maybe it's better to cut the hike short. Are you on day three of a seven-day trek? You'll need to treat and protect it properly to continue safely.
Adjusting your footwear can help. Loosen laces around the problem area. Add padding with moleskin or a blister pad. Consider taking shorter steps or adjusting your gait slightly to reduce pressure on the affected area.
On multi-day hikes, establish a blister care routine. Morning: clean and redress blisters before putting on socks. Evening: let feet air out, clean any dressings, apply fresh ointment and bandages for overnight healing.
Multi-Day Hike Blister Care Protocol
Extended trips require a different approach. You can't just treat a blister once and forget about it. Days of continued walking demand ongoing foot care.
Morning routine: Remove dressings from the night before. Clean the area with antiseptic or clean water. Apply fresh antibiotic ointment. Put on clean, dry socks. Check that boots are properly tied and not causing new friction points.
Midday check: During lunch or long breaks, inspect your feet. Look for new hot spots. Check existing dressings—replace if loose, wet, or dirty. This is also a good time to change socks if your feet are sweaty.
Evening routine: Remove all footwear and let feet air out. Clean blister sites thoroughly. For healing blisters, consider leaving them uncovered overnight if you're in camp and not walking around. Apply ointment and a light dressing for sleeping.
I followed this protocol on a 50-mile section of the AT and managed a developing heel blister for four days without it becoming trip-ending. Consistent care beats heroic intervention every time.
When to Seek Medical Care?
Most hiking blisters can be managed on the trail with proper supplies and technique. But some situations require professional medical attention.
Seek care if you notice signs of infection: redness spreading from the blister, warmth around the area, swelling, or pus. Red streaks extending from the blister site are particularly concerning—they indicate the infection may be spreading through your lymphatic system.
Fever is a serious warning sign. If you develop a fever along with a blister infection, get off the trail and see a doctor. This can indicate a systemic infection that requires antibiotics.
Hikers with diabetes or circulation problems should seek medical care for any foot wound. These conditions reduce healing capacity and increase infection risk significantly. What's a minor problem for most hikers can become a serious issue for diabetics.
Very large or deep blisters, especially those near joints or affecting mobility, may warrant professional evaluation. And if you haven't had a tetanus shot in the past 10 years, any open blister exposure should prompt a visit to your doctor for a booster.
Frequently Asked Questions
Should you pop a blister when hiking?
The general rule is not to pop a blister while hiking because intact skin provides protection against infection. However, you should drain a blister if it is painful, large, or located in a high-friction area that interferes with walking. Always use sterile technique if you must drain it.
How do you treat a blister while hiking?
Clean the area with antiseptic or alcohol. If draining, sterilize a needle and make small holes at the blister edge, not the center. Gently drain fluid, leave the skin flap intact, apply antibiotic ointment, and cover with a non-stick dressing secured with tape.
Should I cover a blister or let it breathe?
Cover popped or drained blisters with a sterile dressing to prevent infection. Intact blisters can be left uncovered when you are not hiking. During activity, always cover blisters with a blister pad or bandage to protect against friction.
What to do if a blister pops on its own?
Do not remove the skin flap. Clean the area gently with antiseptic or clean water. Apply antibiotic ointment immediately and cover with a non-stick dressing. Monitor for signs of infection over the following days.
How to prevent blisters when hiking?
Break in boots properly before long hikes. Wear moisture-wicking merino wool socks and avoid cotton. Address hot spots immediately by stopping and applying moleskin. Manage foot moisture by changing socks regularly and keep feet dry.
How long does it take for a popped blister to heal?
Most blisters heal within 3 to 7 days with proper care. Keep the area clean and covered with antibiotic ointment. Do not remove the skin flap. Healing takes longer if the blister becomes infected or continues to experience friction.
What are the signs of an infected blister?
Watch for increasing redness spreading from the blister, warmth around the area, swelling or increased pain, yellow or white pus discharge, and red streaks extending from the site. Fever is a serious sign requiring immediate medical attention.
Can you hike with a blister?
Yes, you can hike with a blister if it is properly treated and protected. Drain if necessary, apply ointment, and cover with a blister pad. Adjust lacing to reduce friction on the area. Consider modifying your route or cutting the hike short if pain affects your gait.
The Final Trail Verdict
After thousands of trail miles and more blisters than I care to count, here is the practical breakdown for your next hike:
- General Rule: Leave small, painless blisters alone and protect with moleskin.
- When to Drain: Pop only large, painful blisters using sterile technique.
- Best Prevention: Merino wool socks + properly broken-in boots + address hot spots immediately.
- Treatment Kit: Carry Adventure Medical Kits or similar for multi-day peace of mind.
Pro Tip: The five minutes you spend addressing a hot spot can save you five days of painful recovery. Stop early, treat properly, and keep hiking.
![Best Synthetic Insulation Materials for [cy]: Performance Compared](https://www.aquamarinepower.com/wp-content/uploads/2026/07/featured-update-19259-1784613941561-300x225.jpg)

![Best Color Sunglasses For Snow [cy]: Amber, Rose & Photochromic Tested](https://www.aquamarinepower.com/wp-content/uploads/2026/07/featured-update-19371-1784613819286-300x225.jpg)