Have you ever dreamed of bringing a slice of the Amazon rainforest or a tropical marsh into your home? I've spent the last five years creating and maintaining various vivariums, and I can tell you that paludariums offer something truly special. Unlike traditional aquariums or terrariums, these unique ecosystems blend water and land habitats, creating a captivating miniature world where aquatic and terrestrial life coexist in perfect harmony.
When I built my first paludarium back in 2019, I made plenty of mistakes. The drainage system failed after three months, my carefully chosen plants withered, and the whole setup turned into what my partner lovingly called "the swamp experiment." But through trial, error, and countless hours of research, I've learned what actually works. Today, I maintain three thriving paludariums, including a 75-gallon centerpiece that visitors always mistake for a professionally installed exhibit.
This guide will walk you through everything I've learned about creating and maintaining these incredible ecosystems. We'll cover the essential planning steps, equipment selection, construction techniques, and long-term care strategies that will help you avoid the pitfalls I encountered. Whether you're a complete beginner or an experienced aquarist looking to expand your horizons, you'll find practical, tested advice that actually works in the real world.
What Is a Paludarium? Understanding the Basics
A paludarium combines elements of both aquariums and terrariums to create a semi-aquatic environment. The word itself comes from the Latin "palus" meaning swamp or marsh, and "arium" meaning a place or container. Think of it as a controlled ecosystem that replicates the transitional zones found in nature where water meets land - like riverbanks, marshes, or mangrove swamps.
What sets paludariums apart from other vivarium types is their unique three-zone structure. The aquatic zone functions like a traditional aquarium, complete with underwater plants, fish, and aquatic invertebrates. The terrestrial zone mimics a terrarium environment with soil, land plants, and creatures that prefer dry conditions. Between these two lies the riparian zone - that magical transition area where semi-aquatic plants thrive and amphibians feel most at home.
I've found that this diversity makes paludariums incredibly rewarding. In my 40-gallon setup, I watch fire-bellied newts transition seamlessly between hunting bloodworms underwater and basking on moss-covered driftwood. The same tank houses a school of white cloud minnows, several species of aquatic plants, terrestrial ferns, and even a small colony of springtails that help maintain the ecosystem's balance.
Paludarium vs Terrarium vs Vivarium: Key Differences
Understanding the distinctions between different vivarium types will help you decide if a paludarium is right for your space and interests. A terrarium focuses exclusively on land-dwelling plants and animals, typically maintaining humidity levels between 50-80% depending on whether it's a desert or tropical setup. These are perfect for reptiles, land snails, or carnivorous plants that need consistent moisture without standing water.
Vivariums serve as the umbrella term for any enclosed ecosystem designed to support life. Every paludarium is a vivarium, but not every vivarium is a paludarium. Aquariums, another type of vivarium, are entirely aquatic environments designed for fish, aquatic plants, and underwater invertebrates. They require different equipment and maintenance routines than their semi-aquatic counterparts.
Ripariums occupy an interesting middle ground, featuring emergent aquatic plants that grow with their roots underwater while their foliage extends above the surface. Unlike paludariums, ripariums typically don't include a true terrestrial section with soil. I maintain one riparium alongside my paludariums, and while it's beautiful, it lacks the diverse habitat options that make paludariums so engaging.
Planning Your Paludarium: Essential Considerations
Successful paludarium creation starts with thorough planning. I learned this the hard way when my first attempt required a complete rebuild after just six months. The most critical decision you'll make is selecting the right container. While you can convert standard aquariums, I recommend starting with tanks at least 20 gallons in capacity. My 29-gallon tall tank has proven ideal for beginners - it provides adequate water volume for stability while offering sufficient vertical space for terrestrial plants to flourish.
Location matters more than you might think. Paludariums need stable temperatures away from direct sunlight, which can cause algae blooms and temperature fluctuations. I keep mine in my home office where the ambient temperature stays between 68-75°F year-round. Consider proximity to electrical outlets for pumps and lights, and ensure the surface can support the considerable weight - my 40-gallon setup weighs approximately 400 pounds when fully established.
Budget planning should account for both initial setup and ongoing maintenance costs. My first basic 20-gallon paludarium cost around $250 to establish, including the tank, substrate, plants, and essential equipment. However, spreading purchases over several weeks made it more manageable. Monthly maintenance runs about $15-20 for water conditioner, plant fertilizer, and occasional livestock food.
Space and Size Requirements
The golden rule I follow is dedicating at least 40% of the tank to water and 30% to land, with the remaining space for the transition zone and open air. This ratio ensures adequate swimming space for aquatic inhabitants while providing sufficient terrestrial habitat. In my 55-gallon paludarium, this translates to roughly 20 gallons of water, creating a stable aquatic environment that's easier to maintain than smaller volumes.
Vertical space often gets overlooked but proves crucial for plant growth and creating visual depth. Tanks under 12 inches tall limit your plant choices and make it challenging to create the cascading, layered effect that makes paludariums so striking. My tallest setup stands 24 inches high, allowing for dramatic hardscape elements and supporting vining plants that would overwhelm shorter enclosures.
Consider your available floor space realistically. While that 75-gallon tank might look amazing, remember you'll need access to all sides for maintenance. I position my tanks with at least 6 inches of clearance on all sides, making water changes, pruning, and glass cleaning much easier. This accessibility becomes especially important as your ecosystem matures and requires more detailed care.
Step-by-Step Paludarium Setup Guide
Building a paludarium requires patience and attention to detail, but following a systematic approach ensures success. I've refined this process through multiple builds, and this method has proven reliable across different tank sizes and styles.
Step 1: Creating the Foundation and Drainage System
Start with a thoroughly cleaned tank - even new aquariums benefit from a vinegar rinse to remove manufacturing residues. The drainage layer forms your foundation and prevents waterlogging in the terrestrial section. I use 2-3 inches of LECA (lightweight expanded clay aggregate) or lava rock, which provides excellent drainage while remaining lightweight. This layer has saved several of my setups from root rot issues that plague poorly drained systems.
Cover the drainage layer with fine mesh or fiberglass window screen to prevent substrate migration. I learned to secure the edges with aquarium-safe silicone after finding soil in my water pump during an early build. This barrier is crucial - without it, your carefully layered substrate will gradually wash into the drainage layer, defeating its purpose.
The false bottom technique revolutionized my paludarium success rate. Using egg crate (plastic lighting diffuser) supported by PVC pipe segments, I create a platform that sits above the water level. This structure supports the land area while allowing water to flow freely beneath, maintaining consistent humidity without waterlogging the terrestrial substrate. The 2-inch gap I maintain has proven optimal for most setups.
Step 2: Constructing the Land and Water Barrier
Creating a reliable barrier between aquatic and terrestrial zones requires careful planning. I've experimented with various materials, and my go-to solution combines expanding foam with silicone-attached rocks or driftwood. The foam provides structure and can be carved to create natural-looking contours, while the attached hardscape materials hide the artificial substrate and provide climbing surfaces for inhabitants.
Apply the foam in thin layers, allowing each to cure fully before adding more. Rushing this step resulted in my first barrier collapsing after two months when uncured foam continued expanding and shifted my carefully placed rocks. Once shaped, I coat exposed foam with silicone and press in coco fiber or dried sphagnum moss, creating a natural appearance that ages beautifully as moss and algae colonize the surface.
Ensure your barrier includes overflow channels or gaps that prevent terrestrial flooding during water changes or pump malfunctions. My current favorite design incorporates a small "beach" area where the land gradually slopes into the water, providing easy access for amphibious inhabitants while looking completely natural.
Step 3: Adding Substrate Layers
The terrestrial substrate requires a specific layering technique for long-term success. Over the drainage layer and mesh barrier, I add a 1-inch layer of activated charcoal, which helps filter toxins and prevent anaerobic bacteria growth. This often-skipped component has noticeably reduced the musty smell that can develop in closed systems.
Next comes the crucial substrate mix. My proven recipe combines 40% organic potting soil (without added fertilizers), 30% orchid bark, 20% sphagnum moss, and 10% sand or perlite. This mixture provides excellent drainage while retaining enough moisture for plant growth. I've tested numerous commercial vivarium substrates, but this DIY blend consistently outperforms them at a fraction of the cost.
For the aquatic section, I use a separate substrate appropriate for my planned inhabitants. Fine sand works well for bottom-dwelling fish and plants with delicate roots, while aquarium gravel suits more robust species. I maintain about 2 inches of substrate depth, sufficient for plant anchoring without creating anaerobic pockets that can harbor harmful bacteria.
Step 4: Installing Filtration and Circulation Systems
Water quality management makes or breaks a paludarium. I've found submersible filters work best for most setups, as they're easily hidden and don't require drilling or complex plumbing. My preferred setup uses a small canister filter rated for twice the water volume, ensuring adequate filtration even with the reduced water movement typical in paludariums.
Creating water circulation without disturbing delicate plants requires finesse. I position spray bars or filter outputs to create gentle surface agitation, promoting gas exchange while avoiding strong currents that stress fish or damage emergent plants. In my 40-gallon setup, adding a small powerhead aimed at the surface eliminated the stagnant zones where algae previously flourished.
Consider incorporating a small waterfall or stream feature using a separate pump. Beyond the aesthetic appeal, this addition significantly improves oxygenation and humidity levels. My most successful paludarium features a coconut fiber-covered ramp where water trickles down, supporting moisture-loving mosses while creating soothing ambient sound.
Step 5: Lighting and Temperature Control
Lighting can make or break your paludarium's success. After trying various options, I've settled on full-spectrum LED systems that provide 6500K color temperature. These lights support both aquatic and terrestrial plant growth while bringing out the natural colors of inhabitants. I run my lights on timers for 10-12 hours daily, mimicking natural photoperiods and preventing algae overgrowth.
Position lights to ensure even coverage across both zones. My setup uses an adjustable LED bar that spans the tank's length, supplemented by a small spotlight highlighting the terrestrial feature plant. This combination provides the 30-50 PAR (Photosynthetically Active Radiation) most paludarium plants need while creating dramatic visual effects.
Temperature stability proves easier than expected with proper planning. Most paludariums thrive at room temperature (68-75°F), but I keep a small adjustable heater in the water section for insurance. The water's thermal mass helps stabilize the entire system - during a recent power outage, my paludarium temperature dropped only 4 degrees over 18 hours while my regular terrarium plummeted 10 degrees.
Selecting the Perfect Plants for Your Paludarium
Plant selection defines your paludarium's character and directly impacts maintenance requirements. Through years of experimentation, I've identified species that reliably thrive in these unique conditions while requiring minimal intervention.
Aquatic Plants That Thrive
Java fern has become my aquatic workhorse plant. This hardy species tolerates the lower light levels common in paludarium water sections and actually prefers being attached to hardscape rather than planted in substrate. I've propagated dozens of plants from a single mother plant, and they've survived temperature swings, snail infestations, and my occasional neglect during busy periods.
Anubias species offer similar resilience with the added bonus of occasionally flowering above water. My Anubias nana 'Petite' has colonized the transition zone in multiple tanks, growing both submerged and emersed forms that showcase the plant's adaptability. The thick leaves resist damage from inhabitants and rarely show algae growth even in higher light conditions.
For creating underwater forests, I rely on various Cryptocoryne species. These plants initially melted when I first introduced them - a common stress response - but quickly rebounded with robust new growth adapted to my water conditions. Aquarium plant care guides helped me understand their specific needs, and now they form dense stands that provide excellent cover for small fish.
Floating plants add another dimension while helping control nutrients that might otherwise fuel algae growth. Red root floaters have proven particularly successful, developing stunning red coloration under bright lights while their trailing roots provide spawning sites for fish. I maintain coverage at about 30% of the surface, ensuring adequate gas exchange while benefiting from their nutrient absorption.
Terrestrial Plants for the Land Area
Fittonia (nerve plant) has earned a permanent place in all my paludariums. These compact plants display striking vein patterns in white, pink, or red, and they thrive in the high humidity while tolerating occasional flooding of their root zone. I've found they serve as excellent indicator plants - when they start wilting, I know humidity has dropped below optimal levels.
Small fern species create that lush, jungle atmosphere I aim for. Button ferns stay compact while providing interesting texture, and peacock fern terrarium care has helped me successfully maintain Selaginella species that shimmer with an almost iridescent blue-green coloration. These plants appreciate the consistent moisture without becoming waterlogged.
Creeping fig (Ficus pumila) has become my go-to climbing plant. Starting from small cuttings, it quickly covers backgrounds and hardscape with tiny leaves that create a mature, established appearance within months. The plant tolerates pruning well, essential for preventing it from overwhelming smaller species, and the trimmed pieces root easily in water for propagation.
Moss deserves special attention in paludariums. Java moss transitions seamlessly between aquatic and terrestrial zones, while terrestrial species like cushion moss and sheet moss carpet the land areas. I maintain several moss species in each setup, as they provide microhabitat for beneficial organisms while contributing to the naturalistic aesthetic.
Plants for the Transition Zone
The riparian zone offers unique opportunities for plants that bridge aquatic and terrestrial habitats. Peace lilies (Spathiphyllum) have surprised me with their adaptability, growing with roots in water while their leaves reach toward the light. Mine regularly flower, adding unexpected beauty to the setup.
Pothos vines, while common, excel in paludarium transition zones. I grow them with roots trailing in the water section, where they help maintain water quality by absorbing nitrates. The vines can be trained along hardscape or allowed to cascade, creating a natural curtain effect. Just remember to prune regularly - left unchecked, pothos can overwhelm a small paludarium within months.
For a unique touch, I've had success with Marsilea hirsuta care in shallow areas. This aquatic clover grows both submerged and emersed, creating carpets that transition smoothly from water to land. The four-leaf clover appearance adds whimsy while the plant's hardy nature ensures long-term success.
Semi-aquatic carnivorous plants add intrigue to any paludarium. Sundews (Drosera) and butterworts (Pinguicula) thrive in the nutrient-poor conditions of sphagnum moss zones while helping control fungus gnats that sometimes appear in terrestrial sections. Watching these plants catch prey adds another layer of interest to the ecosystem.
Choosing Compatible Animals for Your Ecosystem
Selecting appropriate inhabitants requires balancing their needs with your paludarium's conditions. I've learned that less is often more - overstocking leads to maintenance headaches and stressed animals that never display natural behaviors.
Aquatic Inhabitants
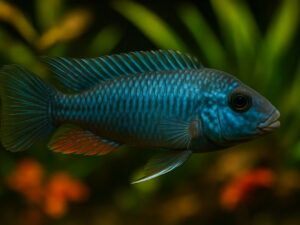
Small, peaceful fish work best in paludarium water sections. White cloud minnows have proven incredibly adaptable in my setups, tolerating temperature fluctuations and lower oxygen levels better than most tropical species. A school of six in my 29-gallon paludarium displays natural schooling behavior while producing minimal waste.
For bottom-dwelling interest, I keep pygmy corydoras catfish. These diminutive cleaners stay under 1 inch long while actively foraging through the substrate. They've proven more suitable than larger corydoras species, which can disturb plant roots and cloud the water with their enthusiastic feeding behavior.
Freshwater shrimp add movement and color while serving as efficient cleanup crews. Cherry shrimp breed readily in stable conditions, and I maintain colonies in all my paludariums. They consume algae, dead plant matter, and excess fish food while rarely bothering healthy plants. The different color morphs available let you choose shrimp that complement your design.
Small snails contribute to the ecosystem's balance, though species selection matters. I intentionally introduced Malaysian trumpet snails to one setup, appreciating how they aerate substrate and consume detritus. However, they've proven impossible to control, and I wouldn't recommend them unless you're comfortable with hundreds of snails. Nerite snails offer a better option - they can't reproduce in freshwater and excel at algae control.
Terrestrial and Semi-Aquatic Animals
Poison dart frogs represent the pinnacle of paludarium inhabitants for many keepers, myself included. My pair of Dendrobates auratus 'Costa Rican Green and Black' has thrived for three years, utilizing every zone of their 40-gallon home. These frogs lose their toxicity in captivity and display fascinating behaviors, from elaborate courtship to tadpole transportation.
Fire-bellied toads offer a hardier alternative for beginners. These colorful amphibians tolerate a wider range of conditions and spend time both swimming and exploring land areas. My group of four creates a chorus of calls during feeding time, adding acoustic interest to the visual display.
Small geckos can work in larger paludariums with secure lids. Mourning geckos have proven particularly suitable - these all-female, parthenogenetic lizards stay under 4 inches and thrive in humid conditions. They're primarily arboreal, utilizing vertical space that might otherwise go unused.
Vampire crabs have gained popularity for good reason. These striking terrestrial crabs need only shallow water for molting while spending most time exploring land areas. My pair has established territories and regularly displays threat postures that never escalate to actual combat. Their purple and orange coloration provides stunning contrast against green plants.
Beneficial Microfauna
Establishing beneficial microfauna populations creates a more stable, self-sustaining ecosystem. Springtails serve as my primary cleanup crew in terrestrial sections, consuming mold and decaying plant matter before it becomes problematic. I maintain cultures separately and add them to new setups, where they quickly establish breeding populations.
Isopods (pill bugs) provide additional decomposition services while serving as occasional food for larger inhabitants. I prefer dwarf white isopods for their unobtrusive nature and rapid reproduction. They've eliminated the need for substrate replacement in my oldest paludarium, now running four years with the original soil.
Various worm species contribute to substrate health. I accidentally introduced blackworms with some plants, and they've become valuable members of the ecosystem, consuming fish waste and aerating aquatic substrate. In terrestrial sections, small composting worms process organic matter, though they require careful monitoring to prevent overpopulation.
Maintenance and Care: Keeping Your Paludarium Thriving
Regular maintenance prevents small issues from becoming major problems. I've developed routines that keep my paludariums healthy with minimal time investment - about 30 minutes weekly for basic care, with monthly deep-cleaning sessions.
Daily and Weekly Tasks
Daily observation takes just minutes but proves invaluable for catching problems early. I check inhabitants during feeding, ensuring everyone appears healthy and accounting for shy species. Water level inspection has prevented pump damage several times when evaporation exceeded expectations. Quick temperature checks confirm heating systems function properly.
Weekly maintenance focuses on water quality and plant care. I perform 20-30% water changes, using dechlorinated water matched to tank temperature. This percentage maintains stability while removing accumulated wastes. During water changes, I trim fast-growing plants, preventing any species from dominating. Dead leaves get removed immediately to prevent decay that could affect water quality.
Glass cleaning maintains viewing quality and plant health. Algae accumulation on glass reduces light penetration, potentially stunting plant growth. I use magnetic cleaners for underwater sections and microfiber cloths for terrestrial areas. The transition zone requires special attention - I use small brushes to clean without disturbing the delicate balance.
Testing water parameters weekly helped me understand my systems' patterns. After six months of consistent results, I've reduced testing to monthly unless something seems off. I monitor pH, ammonia, nitrite, and nitrate levels, with my established tanks consistently showing 6.8-7.0 pH and nitrates under 20ppm.
Monthly Deep Cleaning
Monthly maintenance addresses issues that weekly care might miss. Filter media gets rinsed in old tank water to preserve beneficial bacteria while removing accumulated debris. I've learned to clean only half the media at once, preventing mini-cycles that can stress inhabitants.
Substrate vacuuming requires care in planted areas. I use narrow tubing to spot-clean around plant bases without disturbing roots. The terrestrial section rarely needs substrate work if microfauna populations remain healthy, though I occasionally turn the top layer to prevent compaction.
Pump and equipment inspection prevents unexpected failures. I disassemble and clean pump impellers, removing accumulated debris that reduces flow rates. Checking silicone seals and barriers ensures the land/water division remains intact. This proactive approach has prevented several potential floods.
Pruning and replanting sessions maintain the aesthetic balance. Fast-growing stems get topped and replanted, while slower species receive minor shaping. I've learned to be conservative - over-pruning can shock plants and disrupt the established balance. Removed plant matter goes to my compost bin or gets propagated for other tanks.
Seasonal Adjustments
Seasonal changes affect paludariums more than fully aquatic systems. Winter heating can drop humidity levels significantly. I combat this by partially covering tanks with glass or acrylic, reducing evaporation while maintaining adequate ventilation. Small ultrasonic foggers provide supplemental humidity when needed.
Summer presents opposite challenges. Rising temperatures can stress cool-loving species and accelerate bacterial growth. I've added small fans to increase evaporation and cooling, and I perform more frequent water changes during heat waves. Reducing photoperiods by an hour helps minimize heat from lighting.
Spring and fall transitions require gradual adjustments. I slowly modify lighting duration to match natural photoperiods, which seems to trigger breeding behavior in some inhabitants. These seasons also prompt thorough equipment checks and replacements before extreme weather arrives.
Plant growth patterns shift seasonally even under artificial lighting. Spring brings vigorous growth requiring more frequent trimming, while winter sees slower development. I adjust fertilization accordingly - liquid fertilizers every two weeks during growing season, monthly during dormant periods.
Troubleshooting Common Paludarium Problems
Every paludarium keeper faces challenges, but understanding common issues and solutions helps you respond quickly and effectively. These problems plagued my early attempts until I learned to recognize warning signs and implement preventive measures.
Algae Overgrowth Issues
Algae blooms frustrated me for months until I understood the underlying causes. Excess nutrients, typically from overfeeding or inadequate plant mass, fuel most algae problems. I reduced feeding to every other day and added fast-growing stem plants that outcompete algae for nutrients. Within three weeks, the green water cleared and hasn't returned.
Different algae types require specific approaches. Hair algae indicates excess iron or CO2 imbalance - I addressed this by reducing iron supplementation and improving surface agitation. Black beard algae, which covered my driftwood, disappeared after I introduced a small group of Siamese algae eaters temporarily. They cleaned every surface before I relocated them to prevent plant damage.
Lighting duration and intensity directly impact algae growth. My initial 14-hour photoperiod promoted algae while exhausting plants. Reducing to 10 hours and adding a two-hour midday break (siesta period) dramatically reduced algae while maintaining healthy plant growth. This technique mimics natural cloud cover and has proven effective across all my setups.
Prevention beats treatment every time. I maintain algae-eating crews appropriate for each tank's size and inhabitants. Scheduled maintenance prevents nutrient accumulation, and I've learned to resist the temptation to overfeed, no matter how eagerly inhabitants beg. These preventive measures have eliminated major algae issues for over two years.
Mold and Fungal Problems
Mold appeared in my first paludarium within weeks, covering driftwood with fuzzy white growth. This common issue typically affects new setups as wood releases nutrients. Rather than panicking, I manually removed visible growth and improved ventilation. The mold disappeared within a month as the wood finished leaching and beneficial organisms established.
Persistent mold indicates environmental imbalances. Poor air circulation creates stagnant pockets where mold thrives. I installed small computer fans on timers, running them for 15 minutes every few hours. This minimal air movement eliminated mold without excessively drying the environment.
Substrate mold often signals overwatering or poor drainage. When mold appeared on my terrestrial substrate, investigation revealed a clogged drainage layer. Rebuilding that section with proper drainage material and adding more springtails resolved the issue permanently. These tiny decomposers now prevent mold by consuming organic matter before it can decay.
Some mold is actually beneficial. The white mycelium networks I initially tried to eliminate actually help break down organic matter and can form beneficial relationships with plant roots. I've learned to distinguish harmful molds (typically black or green with musty odors) from beneficial ones (usually white, odorless networks in substrate).
Plant Health Issues
Yellowing leaves plagued my early planted tanks until I understood nutrient deficiencies. Nitrogen deficiency causes older leaves to yellow first, while iron deficiency affects new growth. I developed a balanced fertilization routine using liquid fertilizers for aquatic plants and slow-release pellets for terrestrial species. This targeted approach maintains vibrant growth without promoting algae.
Root rot destroyed several expensive plants before I learned proper planting techniques. Terrestrial plants need well-draining substrate - standing water kills roots within days. Creating raised planting areas and using appropriate substrate mixes has eliminated this issue. For marginal plants, I plant them slightly above the water line, allowing roots to seek moisture without drowning.
Light deficiency symptoms took me longest to recognize. Plants stretching toward light (etiolation), losing lower leaves, or developing pale coloration all indicate insufficient illumination. Upgrading to full-spectrum LEDs and ensuring proper coverage resolved these issues. I now measure PAR values when setting up new tanks, ensuring at least 30 PAR reaches all planted areas.
Transitioning plants between submerged and emersed growth causes temporary die-back that worried me initially. Now I expect this adjustment period and trim affected leaves promptly. New growth adapted to current conditions appears within weeks. Understanding this natural process has saved me from discarding healthy plants that were simply adapting.
Water Quality Management
Cloudy water in my first setup persisted for weeks despite frequent water changes. Bacterial blooms, common in new tanks, cause this milky appearance. Patience proved the best remedy - once beneficial bacteria established, the water cleared permanently. Adding established filter media from another tank can accelerate this process.
Ammonia spikes threatened inhabitants several times during my learning period. Overfeeding, dead animals, or decaying plant matter can trigger these dangerous events. I now maintain minimal feeding schedules and perform immediate water changes if ammonia appears. Keeping fast-growing plants and adequate filtration provides biological buffer against spikes.
pH crashes caught me off guard in soft water setups. Without adequate buffering, biological processes gradually acidify water. Adding crushed coral to filters provides slow-release buffering, maintaining stable pH between water changes. This simple addition has prevented the pH swings that previously stressed sensitive inhabitants.
Surface film formation indicates inadequate surface movement and gas exchange. This biofilm harbors bacteria and reduces oxygen transfer. Adjusting filter outputs to create gentle surface ripples eliminated this issue. In persistent cases, I use surface skimmers or simply drag paper towels across the surface during maintenance.
Advanced Paludarium Techniques and Innovations
After mastering basic paludarium care, exploring advanced techniques adds new dimensions to the hobby. These methods require more investment and expertise but create truly spectacular displays.
Automated Systems and Smart Technology
Automation has revolutionized my paludarium management. Wi-Fi enabled timers control lighting, creating sunrise and sunset effects that trigger natural behaviors in inhabitants. My newest setup uses programmable LED controllers that simulate weather patterns, including occasional "storms" with dimmed lights and increased misting.
Automatic dosing systems maintain consistent fertilization and water chemistry. I use a simple drip system for liquid fertilizers, delivering precise amounts daily rather than weekly doses. This consistency has improved plant growth while reducing algae, as nutrients never reach excess levels that algae exploit.
Environmental monitoring provides valuable data for optimization. Wireless sensors track temperature, humidity, and light levels, sending alerts if parameters drift outside acceptable ranges. This technology has prevented several potential disasters, including a heater malfunction detected while I was traveling.
Automatic top-off systems maintain consistent water levels despite evaporation. Using float valves connected to reserve containers, these simple devices have eliminated daily top-offs and prevented pump damage from low water levels. The consistent water level also maintains proper land/water ratios.
Creating Misting and Rain Systems
Misting systems transformed my terrestrial sections from surviving to thriving. Using reptile foggers or ultrasonic humidifiers connected to timers, I maintain 80-90% humidity without manual misting. The systems run for two minutes every two hours, creating morning dew effects that many plants and animals require.
Rain systems add incredible realism while providing practical benefits. I built mine using aquarium pumps and drip irrigation tubing with tiny holes. "Rainfall" occurs twice daily for five minutes, washing dust from leaves and triggering breeding behavior in poison dart frogs. The sound alone justifies the investment.
Proper drainage becomes critical with automated water features. I learned to include overflow drains after a timer malfunction flooded my terrestrial section. Now all my automated systems include failsafes - overflow channels, moisture sensors that cut power if flooding occurs, and backup drainage paths.
These systems require regular maintenance to prevent clogging. Mineral deposits from evaporation can block misting nozzles within weeks. I perform monthly cleaning with diluted vinegar and maintain spare nozzles for quick replacements. This proactive maintenance ensures consistent performance.
Building Complex Aquatic Features
Multi-level water features create stunning visual effects while improving circulation. My favorite design includes a hidden pump that creates a stream flowing through the terrestrial section before waterfalling back to the main pool. This feature supports unique plant species while providing enrichment for inhabitants that utilize flowing water.
Cave systems beneath the terrestrial section offer shelter for nocturnal species. Using PVC pipe and expanding foam covered with substrate, I created networks that stay dark and humid. These retreats have encouraged natural behavior in shy species that previously remained hidden.
Tidal systems represent the ultimate challenge. Using programmable pumps and overflow chambers, I simulate twice-daily tidal cycles in one experimental setup. This complexity requires careful planning but supports unique organisms like fiddler crabs and mangrove seedlings that require periodic flooding.
Beach zones with gradual slopes between water and land provide naturalistic transitions. Using fine sand and carefully positioned rocks, I create areas where amphibians can easily enter and exit water. These zones also support marginal plants that prefer wet feet but not full submersion.
Educational Applications and Benefits
Paludariums offer exceptional educational value that extends far beyond simple pet keeping. Paludarium setup guide resources have helped me develop educational programs that engage learners of all ages.
STEM Learning Opportunities
Building paludariums teaches practical engineering skills. Students learn about water pressure, filtration principles, and structural design while constructing barriers and planning layouts. My workshop participants consistently express surprise at the problem-solving required for successful construction.
Ecosystem dynamics become tangible in paludariums. Nitrogen cycling, food webs, and symbiotic relationships play out in real-time. I've watched students grasp complex ecological concepts by observing springtails consuming waste, plants absorbing nutrients, and predators controlling populations - lessons that textbooks alone rarely convey effectively.
Chemistry principles gain relevance through water testing and adjustment. Understanding pH, dissolved gases, and nutrient cycles becomes practical rather than abstract. Students in my programs test parameters, calculate dosing requirements, and observe how chemical changes affect living organisms.
Biology concepts from cellular to ecosystem levels integrate naturally. Photosynthesis becomes visible through pearling plants, while decomposition cycles play out in miniature. I've used paludariums to demonstrate evolution concepts by showing how the same plant species develops different characteristics when grown emersed versus submerged.
Therapeutic and Wellness Benefits
The therapeutic value of paludariums extends beyond simple relaxation. Maintaining these ecosystems provides structure and routine that many find grounding. The daily rituals of feeding and observation create mindful moments in otherwise hectic schedules. I've introduced paludariums to several friends dealing with anxiety, and all report decreased stress levels.
Sensory engagement makes paludariums particularly valuable for therapeutic settings. The sound of trickling water, earthy substrate smells, varied textures, and visual complexity provide multi-sensory experiences. Healthcare facilities increasingly recognize these benefits - I've helped install paludariums in two therapy centers where they've become focal points for relaxation.
Responsibility and nurturing instincts develop through paludarium care. Children especially benefit from caring for these ecosystems, learning patience and consistency while developing empathy for living creatures. My nephew's behavior and focus improved noticeably after he took responsibility for his own small paludarium.
Connection with nature becomes possible even in urban environments. For apartment dwellers with limited outdoor access, paludariums provide daily nature interactions. This connection has proven mental health benefits, and I've noticed my own mood improves during winter months when I spend time with my indoor ecosystems.
Cost Analysis and Budget Planning
Understanding the true costs of paludarium keeping helps set realistic expectations and prevents budget overruns that might force premature abandonment of the hobby.
Initial Setup Costs
Basic 20-gallon setups can be achieved for $150-250 with careful shopping. This includes a standard aquarium ($40-60), basic lighting ($30-50), simple filter ($20-30), substrate materials ($30-40), and starter plants ($30-50). Shopping sales and buying used equipment can reduce costs further - I built my first paludarium for under $100 using secondhand components.
Mid-range 40-gallon systems typically require $400-600 investment. Better lighting ($100-150), programmable equipment ($50-100), quality hardscape ($50-100), and diverse plant selection ($75-125) account for increased costs. This level provides the sweet spot of manageable maintenance with impressive visual impact.
Advanced setups with automation and complex features can exceed $1000. My automated 75-gallon showcase cost approximately $1500, including smart controls ($200), CO2 injection ($250), custom backgrounds ($150), and rare plants/inhabitants ($300). While expensive, the reduced maintenance and superior results justify the investment for serious enthusiasts.
Hidden costs often surprise newcomers. Test kits ($30-50), maintenance tools ($40-60), backup equipment ($50-100), and quarantine setups ($75-125) add several hundred dollars to initial investments. I recommend budgeting an additional 50% beyond basic setup costs for these essentials.
Ongoing Maintenance Expenses
Monthly costs average $15-30 for established paludariums. Water conditioner ($5), fertilizers ($5-10), food for inhabitants ($5-10), and electricity ($5-10) comprise regular expenses. Buying supplies in bulk reduces costs - I spend about $200 annually for consumables across three paludariums.
Periodic replacements add to long-term costs. Filter media needs replacement every 3-6 months ($20-40 annually), while LED bulbs last 2-3 years ($50-100 replacement). Substrate refresh might be needed every 2-4 years ($30-50), though established systems with healthy microfauna can run indefinitely without substrate replacement.
Inhabitant costs vary widely by species. Common fish and invertebrates cost $20-50 to stock initially, while specialized species like poison dart frogs might cost $50-200 each. Veterinary care, though rarely needed, should be budgeted - exotic vet visits typically cost $75-150.
Plant replacement and additions provide ongoing expenses and opportunities. While many plants propagate freely, adding new species for variety costs $10-30 per plant. I budget $100 annually for new plants, though trading with other hobbyists reduces actual expenses significantly.
Cost-Saving Strategies
DIY approaches dramatically reduce costs. Building custom backgrounds with expanding foam and painting costs under $30 versus $100+ for commercial options. Creating your own substrate mixes saves 50-75% over premixed varieties. I maintain spreadsheets comparing DIY versus commercial costs, consistently saving 40-60% through DIY methods.
Plant propagation eliminates ongoing plant costs after initial investment. Every plant I purchase gets propagated once established, creating backup plants and trading stock. Local hobbyist groups facilitate trades - I haven't purchased common plants in two years thanks to active trading.
Culturing live foods reduces feeding costs while improving inhabitant health. Maintaining cultures of fruit flies, springtails, and blackworms requires minimal space and effort while providing superior nutrition compared to commercial foods. My cultures cost about $50 to establish but have provided thousands of feedings.
Energy efficiency improvements pay long-term dividends. Upgrading to LED lighting reduced my electricity costs by 60%. Adding timer controls prevents lights running unnecessarily, while insulating tanks during winter reduces heating costs. These improvements paid for themselves within one year.
Frequently Asked Questions
How long does it take for a paludarium to fully establish?
Based on my experience, expect 2-3 months for basic establishment and 6-12 months for full maturity. The aquatic section typically cycles within 4-6 weeks, while terrestrial plants need 2-3 months to establish root systems.
Moss coverage and natural aging that creates the most attractive displays takes at least six months. My most impressive paludarium didn't reach its peak appearance until 18 months after setup.
Can I convert my existing aquarium into a paludarium?
Absolutely! I've converted three standard aquariums successfully. The main requirement is reducing water level to create land space. Start by lowering water to 40-50% capacity, then build your land section using the techniques described earlier.
Existing filtration usually works fine with reduced water volume, though you might need to adjust flow rates. The established bacterial colonies in mature aquariums actually make conversion easier than starting fresh.
What size tank is best for beginners?
I recommend starting with 20-40 gallon tanks. Smaller tanks prove harder to maintain stable conditions, while larger ones require more investment and commitment.
My 29-gallon tall has been perfect for learning - large enough for diverse inhabitants and plants while remaining manageable for maintenance. The vertical space allows for attractive terrestrial sections without sacrificing swimming room.
How do I prevent escapees from my paludarium?
Secure lids are essential for most inhabitants. I use glass lids with ventilation strips, or screen tops for better airflow. Small gaps around equipment get plugged with filter foam.
For tiny escapees like fruit flies (dart frog food), I apply petroleum jelly barriers around the rim. In four years, I've only had two escapes - both were my fault for leaving lids improperly secured during maintenance.
Is CO2 injection necessary for planted paludariums?
CO2 isn't necessary for most setups. I ran all my paludariums without CO2 for three years with excellent plant growth. The terrestrial section naturally produces CO2 through decomposition, while the reduced water volume means atmospheric CO2 dissolves more readily.
I only added CO2 to my display tank for specific demanding aquatic plants. Start without it - you can always add it later if needed.
How often should I change the water in a paludarium?
Weekly 20-30% water changes work for most established systems. New setups might need more frequent changes while cycling.
I test parameters weekly and adjust accordingly - heavily stocked tanks need more frequent changes, while lightly populated, heavily planted systems can go two weeks between changes. The key is consistency - irregular maintenance causes more problems than slightly suboptimal schedules.
Can I keep fish and amphibians together?
It depends on species selection and tank size. I successfully keep small fish with fire-bellied toads and newts, but avoid combinations where either could eat the other.
Peaceful community fish work well with most amphibians. Research specific species requirements - some amphibians release toxins that affect fish, while others require different water parameters. My mixed species tanks have thrived with careful selection.
What's the minimum equipment needed for a basic paludarium?
At minimum, you need: a tank, appropriate lighting, basic filtration, substrate materials, and heating (if needed). Everything else enhances success but isn't strictly necessary.
My first paludarium used a simple sponge filter, desk lamp with full-spectrum bulb, and basic substrates. It wasn't pretty, but it taught me fundamentals without major investment. Start simple and upgrade as you learn what works for your situation.
How do I deal with condensation on the glass?
Condensation is normal but can obscure viewing. I use magnetic glass cleaners for quick daily wipes. Improving ventilation reduces condensation - small fans on timers help without dropping humidity excessively.
Positioning lights outside rather than inside the tank also reduces temperature differentials that cause condensation. Some condensation actually benefits the ecosystem by increasing humidity and creating water droplets that many inhabitants utilize.
What should I do if I'm going on vacation?
Paludariums handle short absences better than traditional aquariums. For trips under a week, I perform maintenance beforehand and use automatic feeders. Longer absences require a caretaker, but instructions are simple - mainly feeding and topping off evaporated water.
I provide written instructions with photos showing proper water levels. In emergencies, established paludariums can survive two weeks unattended, though I don't recommend testing this.
Conclusion: Your Paludarium Journey Starts Here
Creating a thriving paludarium represents one of the most rewarding projects I've undertaken in this hobby. These unique ecosystems offer endless opportunities for creativity, learning, and connection with nature. Whether you're drawn to the technical challenge of balancing multiple habitats, the aesthetic appeal of miniature landscapes, or the educational value of observing ecosystem dynamics, paludariums deliver on all fronts.
The journey from my failed "swamp experiment" to maintaining multiple thriving paludariums taught me patience, observation, and respect for natural processes. Each setup has presented unique challenges and rewards, from watching poison dart frogs raise tadpoles to discovering unexpected plant combinations that flourish together. These experiences have enriched my understanding of ecology while providing daily moments of wonder and tranquility.
Starting your first paludarium might seem daunting, but remember that every expert began as a beginner. Take inspiration from nature, start with a manageable size, and don't fear mistakes - they're valuable learning opportunities. Join online communities, visit local hobbyist groups, and share your experiences. The paludarium community is remarkably supportive, always eager to help newcomers succeed.
As you embark on this journey, focus on creating a balanced ecosystem rather than a perfect display. Nature rarely achieves symmetry or follows design rules, yet natural habitats captivate us with their organic beauty. Let your paludarium evolve, embrace unexpected developments, and enjoy the process of cultivation and discovery. Within months, you'll have created not just an attractive display, but a functioning ecosystem that provides endless fascination and learning opportunities.
The techniques and insights I've shared come from real experience - both successes and failures. Your paludarium journey will be unique, influenced by your space, budget, and interests. Start with the fundamentals, experiment with confidence, and most importantly, enjoy the creative process of bringing a slice of nature into your home. The reward of watching your miniature ecosystem thrive and evolve makes every moment of planning and maintenance worthwhile.