I'll never forget the day my $40 water bottle holder ripped at the gym. That expensive neoprene pouch lasted exactly three months before the seam gave way. Standing there with my water bottle rolling across the floor, I thought: there has to be a better way.
After testing dozens of methods over the past five years, I found that making your own water bottle holder costs about $8-12, takes less than two hours, and produces something far more durable than most store-bought options. I've made holders for gym bags, hiking trips, school backpacks, and even sold a few at craft fairs.
The secret is choosing the right method for your skill level. Sewing creates the most professional finish. No-sew methods work great for beginners. Upcycled old shirts turn into free holders with zero waste.
Quick Summary: Three methods to make a water bottle holder - sewing (durable, professional), no-sew fabric glue (beginner-friendly, 30 minutes), or upcycled t-shirt (free, eco-friendly). Choose based on your skills and materials available.
Methods Comparison at a Glance
| Method | Difficulty | Time | Cost | Durability |
|---|---|---|---|---|
| Sewing | Intermediate | 1.5-2 hours | $10-15 | Excellent |
| No-Sew | Beginner | 30-45 minutes | $8-12 | Good |
| Upcycled T-Shirt | Beginner | 20-30 minutes | Free | Fair |
Materials and Tools You'll Need
The materials you choose make all the difference. After making over 50 holders, I've learned that fabric weight determines durability more than anything else.
For outdoor or gym use, you want medium-weight fabric. Canvas, cotton duck, or 600D polyester work best. These fabrics withstand daily abuse and won't stretch out of shape.
Fabric Options
Fabric Weight: Measured in ounces per square yard. For water bottle holders, look for 6-10 oz fabric. Lightweight cotton (under 6 oz) will stretch and tear. Heavy canvas (over 12 oz) is difficult to sew.
Cotton canvas offers the best balance of durability and ease of sewing. It's forgiving for beginners and holds up well to daily use. For waterproof holders, 600D Oxford polyester resists water and adds extra durability.
Outdoor use calls for ripstop nylon or waterproof canvas. These materials shed water and dry quickly after rain or spills.

HYVAKUPPA Waterproof Canvas Cloth Fabric by The...
Material: 600D Oxford Polyester
Width: 60 inches
Water Resistant: Yes
Quantity: 3 yards
Best For: Outdoor and gym bottle holders
What we like
- Water resistant coating
- Durable 600D weight
- 60 inch width for multiple projects
- UV resistant for outdoor use
What could be better
- Heavier than cotton
- Requires heavy duty needle
- Slightly harder to sew
Essential Tools
If you're new to sewing, don't panic. You don't need a fancy setup. My first holder was made with a $15 sewing kit and scissors from the kitchen drawer.
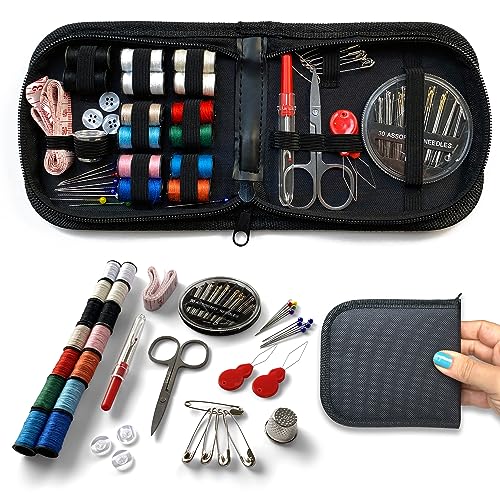
Trusew Sewing Kit Beginners Kit
Type: Sewing starter kit
Includes: Thread, needles, pins, scissors, measuring tape
Skill Level: Beginner
Complete: Yes
What we like
- Contains all basics
- Beginner-friendly instructions
- Portable storage case
- Great starter set
What could be better
- Basic quality tools
- Refill needed eventually
Strap Hardware
Professional-looking holders need adjustable straps. A complete hardware kit gives you buckles, webbing, and D-rings for secure attachments.
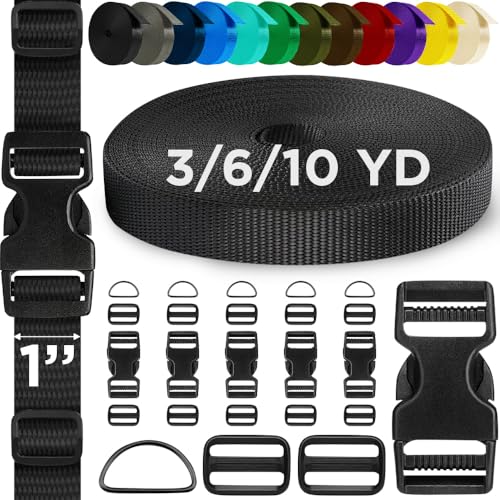
TECEUM Buckles & Strap Kit – 1" Black Nylon...
Includes: 6 yards webbing, 6 buckles, 12 tri-glides, 6 D-rings
Webbing Width: 1 inch
Material: Nylon
Color: Black
What we like
- Complete hardware kit
- Enough for 6+ projects
- Heavy duty buckles
- Durable nylon webbing
What could be better
- Black only
- Webbing may need cutting
Sizing Reference
Before cutting fabric, measure your bottle. Standard sizes vary significantly between brands. I learned this the hard way after making a holder that was too narrow for my Hydro Flask.
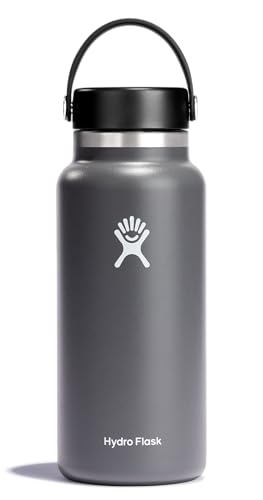
Hydro Flask Water Bottle - Insulated Stainless...
Capacity: 32 oz
Diameter: 3.6 inches
Height: 9.4 inches
Material: Stainless steel
Standard sizing for most holders
What we like
- Popular bottle size
- Standard dimensions
- Insulated construction
- Widely available
What could be better
- Expensive for reference only
Bottle Sizing Chart
Use these measurements as starting points. Always add 1-2 inches to the diameter for ease and seam allowance.
| Bottle Brand/Size | Diameter | Height | Cut Width | Cut Height |
|---|---|---|---|---|
| Standard 16-18 oz | 2.6-2.8 inches | 7-8 inches | 10 inches | 12 inches |
| Hydro Flask 21 oz | 2.9 inches | 8.8 inches | 10.5 inches | 13 inches |
| Standard 32 oz | 3.5-3.6 inches | 9-10 inches | 11.5 inches | 14 inches |
| Nalgene Wide 32 oz | 3.5 inches | 9.4 inches | 11.5 inches | 14 inches |
| Large 40 oz | 3.6-3.8 inches | 11-12 inches | 12 inches | 16 inches |
Method 1: Sewing a Water Bottle Holder
Sewing creates the most durable and professional-looking holder. This method produces something that lasts for years of daily use.
Difficulty & Time
Intermediate
1.5-2 Hours
$10-15
Materials Needed
- 1/2 yard medium-weight fabric (canvas, cotton duck, or 600D polyester)
- Matching thread
- 1 inch webbing (48-60 inches for strap)
- 1 adjustable side release buckle
- 1 tri-glide slide (for strap adjustment)
- Optional: 1 D-ring for attachment point
Tools Needed
- Sewing machine or hand sewing needle
- Fabric scissors
- Measuring tape or ruler
- Pins or clips
- Iron and ironing board
- Fabric marker or chalk
Step 1: Cut Your Fabric
Cut one rectangular piece of fabric using your bottle measurements. Add 2 inches to the width for seam allowance and ease. Add 4 inches to the height for hem and seam allowance.
Example for a standard 32 oz bottle: Cut fabric to 11.5 inches wide by 14 inches tall.
Seam Allowance: The space between the fabric edge and the stitching line. For this project, use a 1/2 inch seam allowance unless otherwise specified. This ensures strong seams that won't unravel.
Step 2: Create the Drawstring Casing (Optional)
For a drawstring closure, fold down the top edge 1/4 inch and press. Fold down another 1 inch and press again. Stitch close to the inner folded edge, leaving a 2-inch opening for threading your drawstring.
Skip this step if using an open top design or planning to add a flap closure later.
Step 3: Sew the Side Seam
Fold your fabric right sides together, matching the short edges. Pin along the side edge. Sew using a 1/2 inch seam allowance. Backstitch at the beginning and end to secure your stitches.
For extra durability, sew the seam twice. Use a second row of stitching 1/8 inch from the first.
Step 4: Create the Bottom Gusset
A gusset gives your holder depth so it stands up properly. This is the step most beginners skip, and it makes a huge difference.
With the tube still wrong side out, match the side seam to the bottom fold. Measure 1.5 to 2 inches from the corner point along both edges. Mark this point with a pin.
Sew across the corner at your marked point. Backstitch securely. Trim the corner to 1/2 inch from your stitching line.
Repeat on the other side. Turn your holder right side out and check that the bottom sits flat.
Step 5: Attach the Strap
Cut your webbing to 48 inches for a shoulder strap or 36 inches for a crossbody strap. Test the length before cutting by draping it over your shoulder.
Thread one end through the female end of your side release buckle. Fold under 1 inch and sew a box stitch or X pattern to secure. Use a heavy-duty needle and go slowly - webbing is thick.
Thread the other end through your tri-glide, then back through the male buckle end. Fold under 1 inch and stitch securely.
Step 6: Attach Strap to Holder
Position your strap ends on the side seam of your holder. Place one 1 inch below the top edge and one 1 inch above the bottom gusset.
Sew in a box pattern with an X through the center. This distributes weight and prevents the strap from pulling out under load.
Step 7: Finish the Top Edge
If you didn't create a drawstring casing, finish the top edge with a double-fold hem. Fold down 1/4 inch and press. Fold down another 1/2 inch, press, and stitch close to the inner fold.
For a professional look, topstitch 1/8 inch from the top edge all the way around.
Sewing Method Pro Tips
I learned these tricks after dozens of holders:
- Use a jean needle (size 90/14 or 100/16) for canvas and thick fabrics
- Lengthen your stitch to 3.0-3.5 for heavy fabrics - shorter stitches can perforate the material
- Test your stitching on scrap fabric first - adjustable straps are difficult to redo once attached
- Reinforce all strap attachment points with bar tacks (tight zigzag stitching back and forth)
Method 2: No-Sew Water Bottle Holder
Don't have a sewing machine or prefer not to sew? No problem. Fabric glue and iron-on tape create perfectly functional holders without a single stitch.
Difficulty & Time
Beginner
30-45 Minutes
$8-12
Additional Materials
- Fabric glue (look for washable, flexible formula)
- OR iron-on hem tape (1/2 inch width)
- Clips or clothespins (to hold seams while glue dries)
Fabric Glue Method
- Cut your fabric using the same dimensions as the sewing method
- Fold and glue - Apply fabric glue along one 1/2 inch edge. Fold the fabric over 1/2 inch and clip in place. Repeat on all four sides for hemmed edges.
- Create the tube - Apply glue along one short edge. Fold the fabric in half lengthwise with wrong sides together. Press the glued seam and clip every 2 inches.
- Form the gusset - Pinch the bottom corners as described in the sewing method. Glue across your marked line. Hold in place with clips until dry.
- Attach strap - Use hot glue or fabric glue to attach webbing. Apply glue generously and press firmly. Let cure for 24 hours before use.
Iron-On Hem Tape Method
Iron-on tape creates cleaner edges than glue but requires an iron. Use this method for a more polished look without sewing.
- Cut fabric and press flat to remove wrinkles
- Fold edges 1/2 inch and press with iron
- Place hem tape between folded layers, centering it on the crease
- Press with iron - Use medium heat with steam. Hold iron in place for 10-15 seconds per section. Don't slide the iron or you'll shift the tape.
- Repeat for all seams and strap attachments
No-Sew Method Tips
After helping my niece make three no-sew holders for school, here's what works best:
- Wait 24 hours before using - glue needs full curing time
- Double-glue strap attachment points - these take the most stress
- Use clips instead of pins - pins create holes that weaken glued seams
- Test your glue on fabric scraps first - some formulas stiffen certain fabrics
- Hand wash only - machine washing can break down glued seams
Method 3: Upcycled T-Shirt Holder
Got an old t-shirt you don't wear? Turn it into a free water bottle holder in about 20 minutes. This is my favorite method for kids or one-time use holders.
Difficulty & Time
Beginner
20-30 Minutes
Free
Materials
- 1 old t-shirt (larger sizes work better)
- Scissors
- Optional: Fabric glue for reinforcements
Step-by-Step Instructions
- Cut the body - Cut straight across the shirt just under the armpits. You now have a fabric tube.
- Cut bottom strip - Cut a 2-inch strip from the bottom hem. This becomes your drawstring.
- Create the casing - Fold over the top of the tube about 1 inch. You can leave it as-is (the fabric won't fray much) or use fabric glue to secure.
- Thread the drawstring - Cut your bottom strip open to make one long piece. Feed it through the casing using a safety pin attached to one end. Tie the ends together.
- Close the bottom - Cut 1-inch slits up from the bottom edge every 2 inches around. Tie each strip to its neighbor to close the bottom (like rag rug techniques). Or simply tie the bottom tightly in a knot for a pouch style.
- Make the strap - Cut 3 wide strips from the remaining shirt fabric. Braid them together and tie each end through holes in your holder.
Denim Upcycle Method
Old jeans make incredibly durable holders. The thick fabric needs no reinforcement.
- Cut a 6x12 inch rectangle from jean leg material
- Fold in half and sew or glue the side seam
- Use the original hem as the top edge (no finishing needed!)
- Cut a strip from remaining denim for the strap
- Use belt loops as attachment points - genius!
Upcycling Benefits
These methods keep fabric out of landfills. The average t-shirt takes 2,700 liters of water to produce. Extending its life matters.
Upcycled holders also have character. Each one is unique. Kids love using their favorite old shirts that no longer fit.
Customization Options and Variations
Once you've mastered the basics, customize your holder for specific needs. Small changes make big differences in functionality.
Strap Options
The strap style determines how you'll carry your holder. Consider your primary use.
| Strap Style | Best For | Length |
|---|---|---|
| Shoulder strap | Gym, everyday carry | 45-50 inches |
| Crossbody | Hiking, travel | 50-60 inches |
| Waist belt | Running, cycling | 35-45 inches |
| Clip handle | Backpack attachment | 6-8 inches |
Closure Types
Quick Closure Guide: Drawstring tops offer easiest access and adjustability. Flap with snap/velcro provides more security. Zippered tops keep bottles from falling out during activity but require more sewing skill.
Drawstring closures work well for most uses. They're quick and allow different bottle heights.
For hiking or active use, add a flap with velcro. Cut a 4x6 inch piece of fabric. Sew one edge to the back of your holder top. Attach velcro to flap and front.
Zippers offer the most security but require zipper sewing skills. Practice on scrap fabric first.
Exterior Pocket
Adding a pocket transforms your holder into a mini bag. Perfect for keys, cash, or earbuds.
Cut a 5x6 inch piece of fabric. Fold right sides together and sew two sides. Turn right side out and press. Center on your holder and sew around three sides, leaving the top open.
Insulated Liner Option
For cold drinks on hot days, add an insulated liner. Neoprene fabric works best but requires special sewing techniques.
Easier option: Use insulated fabric as your outer layer. Look for "insulated fabric" or "thermal fabric" at craft stores. It has a metallic backing that reflects heat.
How to Waterproof Your Water Bottle Holder?
This is the feature no one else covers. After having my canvas holder get soaked in a rainstorm, I developed several waterproofing methods that actually work.
Waterproof Fabric Choices
The best waterproofing starts with fabric selection. 600D Oxford polyester with PU coating resists water naturally. Ripstop nylon with DWR (durable water repellent) treatment sheds water immediately.
Canvas can be waterproofed after construction. Look for canvas-specific treatments - regular sprays won't penetrate the tight weave.
DIY Waterproofing Spray
For cotton or canvas holders, spray-on waterproofing adds water resistance without changing fabric feel.
- Clean your holder thoroughly and let dry completely
- Work in a well-ventilated area outdoors
- Apply fabric waterproofing spray in even coats, 6-8 inches from fabric
- Pay special attention to seams and bottom gusset
- Let dry for 24 hours before use
- Reapply after 5-10 washes or when water stops beading up
Wax Waterproofing (Traditional)
Paraffin wax creates durable waterproofing on canvas and cotton. This is how traditional canvas bags were treated.
- Melt paraffin wax in a double boiler
- Paint onto fabric with a natural bristle brush
- Use a hair dryer to melt wax into fabric fibers
- Wipe off excess and let cool overnight
Waterproofing Method Comparison
Wax: Durable, 2+ seasons
PU Fabric: Best performance
Seam Sealing
Water always finds the seams. Seal needle holes with seam sealer or clear nail polish. Apply to the inside of all seams after construction.
Care and Maintenance
Proper care extends your holder's life for years. I have holders from three years ago that still look new.
Washing Instructions
- Sewn holders: Machine wash cold, gentle cycle. Hang dry or tumble dry low. Remove strap before washing if possible.
- No-sew holders: Hand wash only. Machine washing breaks down glue. Air dry flat.
- Upcycled holders: Wash according to original fabric care. Most t-shirt holders handle machine washing fine.
Storage
Store holders empty and flat. Crumpled storage creates permanent wrinkles in canvas and can stress glued seams.
Keep in a dry place away from direct sunlight. UV rays degrade fabric over time, especially waterproof coatings.
Repair Tips
Small holes appear with heavy use. Catch them early and repair quickly.
For sewn holders, use iron-on patches on the inside. Choose a matching fabric for invisible repairs.
For no-sew holders, fabric glue patches work. Apply glue around the hole, press patch, and weight down while drying.
Tips for Success and Troubleshooting
After years of making these holders, I've made every mistake in the book. Here's how to avoid them.
Common Mistakes to Avoid
- Not measuring your bottle first - I once made a holder that was too narrow. Always measure twice before cutting.
- Skipping the gusset - Flat-bottomed holders don't hold bottles securely. The gusset takes 5 minutes and makes a huge difference.
- Using stretchy fabric - T-shirt fabric stretches out of shape. Stick to stable woven fabrics for best results.
- Insufficient strap reinforcement - Straps pull out under weight. Use box stitches with X patterns on all attachment points.
- Rushing glue drying time - Most glues need 24 hours to fully cure. Testing early leads to strap failure.
Troubleshooting Guide
| Problem | Cause | Solution |
|---|---|---|
| Bottle falls out | Opening too wide | Add drawstring or elastic casing |
| Holder too loose | Fabric dimensions too large | Sew deeper side seams or add elastic |
| Strap pulling out | Insufficient reinforcement | Add bar tacks at attachment points |
| Fabric fraying | Unfinished edges | Apply fray check or zigzag stitch edges |
| Glue not holding | Insufficient drying time | Let cure 24 hours before use |
Pro Tips from Experience
- Make a pattern from cardboard once you find dimensions that work. Trace it for future holders.
- Buy webbing and buckles in bulk - enough for 10+ holders costs the same as materials for 2-3.
- Pre-wash fabric before cutting. Some fabrics shrink significantly after first wash.
- Use a walking foot on your sewing machine for heavy fabrics - it prevents slipping.
- Test on cheap fabric first. I wasted expensive canvas learning basic techniques.
- Join a sewing community. Reddit's r/sewing helped me fix countless mistakes.
Buying vs. Making: Cost Comparison
Is it worth making your own? Let's break down the numbers.
| Option | Material Cost | Time | Durability |
|---|---|---|---|
| DIY sewn holder | $10-15 (makes multiple) | 1.5-2 hours | Excellent |
| DIY no-sew holder | $8-12 | 30-45 minutes | Good |
| Upcycled holder | Free | 20-30 minutes | Fair |
| Store-bought basic | $15-25 | Immediate | Fair to good |
| Premium holder | $35-50 | Immediate | Excellent |
After making 20+ holders, my material cost per holder dropped to about $4. Buying fabric and hardware in bulk makes a huge difference.
Pre-Made Alternative Comparison
Sometimes buying makes sense. If you need a holder immediately or don't enjoy crafting, commercial options exist.
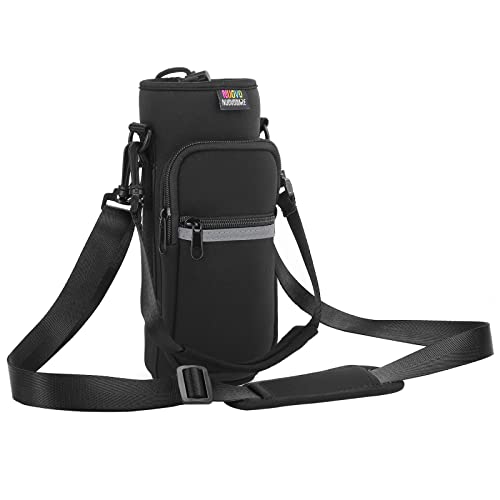
Nuovoware Water Bottle Carrier Bag, 25oz/32oz...
Fits: 25-32 oz bottles
Material: Neoprene
Strap: Adjustable shoulder/hand
Pockets: 2 exterior
Use: Hiking, travel, camping
What we like
- Immediate availability
- Neoprene insulation
- Professional finish
- Two pockets included
What could be better
- Limited color options
- More expensive than DIY
- Sizing not adjustable
The neoprene material offers insulation that DIY versions lack unless you buy special fabric. For keeping drinks cold, neoprene can't be beat.
Frequently Asked Questions
What materials do I need to make a water bottle holder?
You need 1/2 yard of medium-weight fabric (canvas, cotton duck, or polyester), matching thread, 1 inch webbing for the strap, and hardware (buckle and tri-glide). Basic tools include scissors, measuring tape, pins, and either a sewing machine or fabric glue for no-sew methods.
How do I make a water bottle holder without sewing?
Use fabric glue or iron-on hem tape instead of stitching. Cut your fabric, apply glue along edges, fold over 1/2 inch, and clip until dry. Create seams with glue and attach straps using generous glue application. Let cure for 24 hours before use.
What size should I make my water bottle holder?
Measure your bottle's diameter and add 2 inches for ease and seam allowance. For height, measure bottle height and add 4 inches for hems. A standard 32 oz bottle needs approximately 11.5 inches wide by 14 inches tall fabric.
How do I waterproof a DIY water bottle holder?
Use waterproof fabric like 600D Oxford polyester or ripstop nylon. For cotton holders, apply fabric waterproofing spray in even coats and let dry 24 hours. Traditional wax waterproofing also works on canvas - melt paraffin wax, paint onto fabric, and heat into fibers with a hair dryer.
Can I make a water bottle holder from an old t-shirt?
Yes. Cut straight across the shirt under the armpits to create a tube. Cut a 2-inch strip from the bottom for a drawstring. Fold over the top edge, thread the strip through as a drawstring, and tie the bottom closed with knots or braided strips.
How long does it take to make a water bottle holder?
Sewn holders take 1.5-2 hours. No-sew methods take 30-45 minutes plus 24 hours drying time. Upcycled t-shirt holders are fastest at 20-30 minutes. Time decreases with practice - my latest holder took just 45 minutes.
What is the best fabric for water bottle holders?
Canvas and cotton duck offer the best balance of durability and ease of sewing. For outdoor use, choose 600D Oxford polyester or ripstop nylon for water resistance. Avoid lightweight cotton that stretches out of shape or thick upholstery fabric that is difficult to sew.
How do I attach a strap to a water bottle holder?
Sew or glue strap ends to the holder's side seam using box stitches with X patterns for reinforcement. Position one end 1 inch below the top edge and one end 1 inch above the bottom gusset. Use bar tacks (tight zigzag stitching) at attachment points for extra strength.
Final Thoughts
Learning how to make a water bottle holder is one of those skills that pays off immediately. You save money, get exactly what you want, and gain a practical skill.
I've given holders as gifts, sold them at craft fairs, and made matching sets for family hikes. Each one gets used for years.
Start with the no-sew method if you're unsure. It builds confidence quickly. Then try sewing once you see the value of having custom carriers.
Your first holder might not be perfect. Neither was mine. But by the third or fourth, you'll be making holders better than anything you can buy.