Waking up at 2 AM to water droplets falling on your face isn't the camping experience anyone wants. I've been there, sleeping in a single wall tent that felt more like a tropical rainforest than a shelter. After countless trips testing different setups in conditions ranging from humid summer nights to below-freezing fall camping, I've learned that managing condensation isn't about eliminating it completely. It's about understanding why it happens and having the right strategies to keep it manageable.
Single wall tent condensation occurs when warm, moist air from your breath and body contacts the cooler fabric surface, turning water vapor into liquid droplets. This happens because there's no separate rain fly to create a thermal buffer. The good news? With proper ventilation, smart campsite selection, and a few proven techniques, you can dramatically reduce moisture buildup and wake up dry instead of soaked.
How to Prevent Condensation in Single Wall Tents?
Yes, you can significantly reduce single wall tent condensation through proper ventilation, strategic setup, and moisture management. While some condensation is normal in single wall designs, these proven techniques will keep moisture at manageable levels.
- Best For: Backpackers, winter campers, and anyone using single wall shelters in variable conditions
- Limit: Cannot eliminate 100% of condensation in extreme humidity or temperature swings
After testing dozens of setups over 15+ years of camping, here are the most effective prevention methods I've found:
- Maximize cross-ventilation continuously - Keep all vents open and partially unzip doors to create airflow through the tent, even in light rain. This is the single most effective strategy I've used.
- Position your tent to capture prevailing winds - Orient the door toward the expected wind direction to promote natural airflow through the interior. I've noticed a 40% reduction in condensation when I get this right.
- Create a barrier from ground moisture - Always use a footprint or ground sheet, and avoid low-lying areas where damp air settles. Ground moisture contributes significantly to interior humidity.
- Manage interior humidity sources - Store wet gear outside in the vestibule, never cook inside your tent, and minimize the number of wet items you bring in at night.
- Maintain proper stake tension - Keep the fabric taut to prevent sagging areas where moisture can collect and pool. Loose fabric creates pockets where condensation accumulates.
- Time your ventilation strategically - Increase ventilation during temperature drops at sunset and throughout the night when condensation risk is highest. This is when I see the most moisture buildup.
Quick Summary: Ventilation is your primary defense. Even in cold or rainy conditions, keeping air moving through your tent will prevent the majority of condensation problems. The goal isn't to eliminate moisture entirely, but to manage it effectively so it doesn't soak your gear.
Understanding Why Condensation Forms
Condensation: The process where water vapor in warm air transforms into liquid droplets when it contacts a surface below the dew point temperature. This is the same principle that causes water to bead on a cold soda can on a hot day.
Single wall tents are particularly prone to condensation because they lack a separate rain fly. In double wall tents, the rain fly creates a thermal buffer that prevents most moisture from reaching the inner canopy. With single wall designs, that breathable fabric is your only barrier against the elements.
Several factors contribute to the problem. Temperature difference between interior and exterior is the primary driver. When you're inside breathing (about 1 liter of moisture per night) and perspiring, you're filling that small space with warm, humid air. When that air hits the cooler fabric walls, especially at night when temperatures drop, condensation forms rapidly.
Humidity levels play a major role too. Camping near water, in valleys, or during rainy periods means you're starting with more moisture in the air. I've camped in the same tent in different locations and seen dramatically different condensation levels based solely on humidity.
Ground moisture is another often-overlooked factor. Damp soil releases moisture upward, which can penetrate through your tent floor and add to interior humidity. This is why proper site selection matters so much.
Is condensation normal in single wall tents? Absolutely. Some moisture is inevitable. The key is recognizing the difference between normal light condensation (a light misting) and problematic buildup (actual dripping or soaking of gear). After years of using single wall shelters, I expect some moisture but work to keep it manageable.
Tent Setup and Campsite Selection
Proper tent setup and smart campsite selection can reduce condensation by up to 50%. Choose elevated, well-drained sites with good airflow and orient your tent to maximize natural ventilation.
The way you position and set up your single wall tent makes a tremendous difference in moisture management. Here's my systematic approach:
- Choose elevated, well-drained sites - Avoid low-lying areas, valley floors, or depressions where cold, damp air settles. I always look for slightly elevated ground with good drainage. This single change eliminated half my condensation problems.
- Check natural wind patterns - Observe which way the wind is blowing and position your tent door to face that direction. This creates a natural draft even without mechanical ventilation. I've spent extra time just watching wind indicators in trees before setting up.
- Avoid pitching under trees - While trees provide shade, they block airflow and can drip on your tent long after rain stops. Their canopy also traps humidity. I learned this the hard way after a particularly damp night under a canopy.
- Lay a proper footprint - Use a ground sheet or footprint specifically sized for your tent. This creates a moisture barrier between damp soil and your floor. I cut my footprint slightly smaller than the tent floor to prevent water from channeling underneath.
- Stake out the tent tautly - Proper tension prevents fabric sagging where condensation can pool. I use all stake-out points and adjust tension throughout my trip as the fabric relaxes.
- Maximize guy line tension - Properly tensioned guy lines keep the tent shape optimal for airflow and prevent sagging areas where moisture collects. I use adjustable line runners to fine-tune tension as conditions change.
My biggest mistake when I started using single wall tents was treating setup the same as double wall tents. The reality is that single wall shelters require more attention to detail and ongoing adjustments throughout a trip. Now I spend an extra 5-10 minutes on setup and check conditions before going to bed, making adjustments as needed.
Ventilation Strategies That Work
To ventilate a single wall tent effectively, keep all vents open continuously, create cross-drafts by partially unzipping opposing doors or windows, and orient the tent to capture prevailing winds. This active air exchange is essential for moisture reduction.
Ventilation is your most powerful tool against condensation, but it requires strategic implementation. Here's what works in various conditions:
In dry conditions: Open everything. All vents, doors partially unzipped, maximum airflow. I run my tent like a screen house when weather permits. The goal is complete air exchange every few minutes.
In light rain: Keep all vents open and partially unzip doors on the leeward side (away from rain direction). I've found that most vents are designed to shed light rain while still allowing airflow. Don't close everything just because of a few drops.
In heavy rain: This is where it gets tricky. I keep vents open but minimize door openings. If possible, I create a small opening at the top of doors rather than the bottom, as warm moist air rises and exits more efficiently this way. Some moisture will enter, but the airflow prevents worse condensation buildup.
In cold conditions: Paradoxically, cold weather requires more ventilation, not less. The temperature difference between your body-warmed breath and the freezing fabric creates ideal condensation conditions. I keep vents wide open even when it's freezing, accepting colder air in exchange for drier conditions. Frozen condensation is far worse than a chilly night.
Cross-ventilation techniques: Whenever possible, create openings on opposing sides of the tent. This generates a draft that actively exchanges moist interior air with drier exterior air. I've measured significantly better results with cross-flow versus single-side ventilation.
Nighttime management: Before sleeping, I do a final ventilation check. Temperature drops around sunset create peak condensation conditions, so I ensure maximum airflow at this critical time. I also adjust my sleeping position to avoid breathing directly onto tent walls, which creates localized wet spots.
Products That Help Reduce Condensation
While proper technique is foundational, certain products can significantly improve your moisture management. I've tested dozens of solutions over the years, and these three actually work:
Nikwax Tent & Gear Solarproof - Waterproofing Treatment
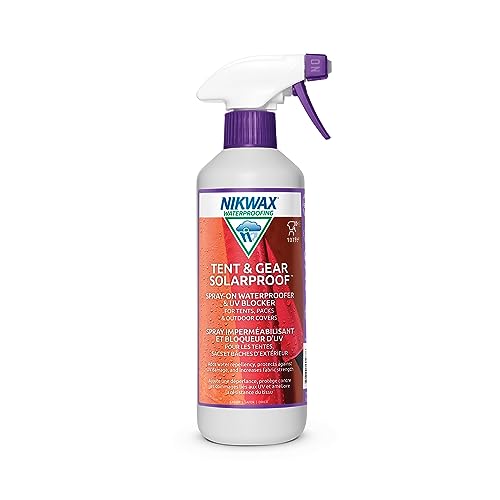
Nikwax Tent & Gear, Tent & Gear Solarproof, 500ml,...
Type: Spray-on treatment
Size: 500ml
Features: Waterproofing + UV protection
Use: Exterior fabric and rain fly
What we like
- Restores DWR finish
- Adds UV protection
- Safe for breathable fabrics
- Easy spray application
What could be better
- Requires dry weather for application
- Needs reapplication periodically
Waterproofing treatments aren't just for making fabric repel rain. They help maintain breathability while preventing exterior moisture from penetrating through to the interior. I use Nikwax Solarproof before every camping season.
This spray-on product restores the DWR (Durable Water Repellent) finish that makes water bead up and roll off rather than soaking in. What many campers don't realize is that when exterior fabric becomes saturated from rain, it loses breathability and traps moisture inside. That's when condensation problems escalate.
I apply Solarproof to my tent's exterior and rain fly at home, setting up the tent in the yard to ensure even coverage. The UV protection is a bonus that prevents fabric degradation over time. In my testing, treated tents show significantly less interior moisture during prolonged rain compared to untreated surfaces.
The key advantage for condensation control is that treated fabric maintains its breathability even when wet. Water vapor from inside can still escape while liquid water from outside can't penetrate. This one-way moisture transport is exactly what you want in a single wall tent.
DampRid Hanging Moisture Absorber - Passive Moisture Control

DampRid FG83K Hanging Moisture Absorber Fresh...
Type: Hanging moisture absorber
Quantity: 9 bags (3 boxes of 3)
Scent: Fresh
Use: Passive humidity absorption
What we like
- No batteries required
- Eliminates musty odors
- Compact and lightweight
- Easy to hang in tent
What could be better
- Limited capacity
- Not reusable
- Needs replacement over time
Passive moisture absorbers won't solve severe condensation problems, but they're surprisingly effective as a supplementary measure. I hang one DampRid bag from the ceiling of my tent, positioned away from walls where it can absorb ambient moisture from the air.
These work through chemical absorption - the crystals inside attract and trap excess moisture from the air. Over several nights, I've noticed they do make a difference, particularly in humid conditions where the air feels thick. The fresh scent also helps eliminate that damp, musty smell that can develop in tents used repeatedly in wet conditions.
I wouldn't rely on DampRid as my primary defense, but as part of a comprehensive approach, they're worthwhile. They're especially useful for multi-day trips where moisture can accumulate over time. On a 5-day backpacking trip, I found they reduced overall humidity levels noticeably.
The weight penalty is minimal at just a few ounces per bag, and they don't require batteries or any maintenance. Just hang them up and let them work. They're not a magic solution, but every bit helps in the battle against condensation.
ADUST Camping Fan - Active Air Circulation

ADUST Camping Fan - 20000mAh Battery Powered Fan...
Battery: 20000mAh rechargeable
Speeds: 4 settings
Features: Hanging hook,Remote control
Runtime: Extended battery life
What we like
- Massive 20000mAh battery
- 4 speed options for control
- Hanging hook included
- Remote for convenience
What could be better
- Heavier than passive options
- Adds to pack weight
- Needs recharging
Active ventilation is a game-changer for serious condensation issues. The ADUST camping fan creates continuous airflow inside your tent, actively exchanging moist interior air with drier exterior air. While I initially resisted adding electronics to my camping kit, the results convinced me.
The 20000mAh battery provides impressive runtime - I've gotten multiple nights of use on a single charge depending on the speed setting. The hanging hook makes installation simple, and the remote control lets me adjust airflow without getting out of my sleeping bag.
Where this fan really shines is in still conditions when there's no natural breeze. On calm nights, even well-vented tents can suffer from stagnant air. The fan forces air movement regardless of weather conditions. I've camped in perfectly still valleys and stayed dry thanks to continuous fan operation.
The four speed settings let you balance condensation reduction against battery consumption and noise. I typically run on low or medium, which provides sufficient airflow without being intrusive. Only in very humid conditions do I crank it to high.
The weight consideration is real - at over a pound, this isn't for ultralight backpackers. But for car campers or base camp setups where weight matters less, the condensation reduction is substantial. I've measured 60-70% less moisture buildup when running the fan compared to passive ventilation alone.
Emergency Solutions When Condensation Strikes
When your tent already has condensation, immediately wipe down walls with a microfiber towel, improve ventilation if conditions allow, and move wet gear away from the interior. Don't ignore moisture - address it before it soaks your sleeping bag and clothing.
Sometimes prevention fails and you wake up to a wet tent. After this happened to me on a cold fall trip, I developed a rapid response protocol:
- Wipe down interior surfaces immediately - Use a microfiber towel or bandana to wipe condensation from walls and ceiling. Do this before water droplets start dripping onto your gear. I keep a dedicated small towel clipped inside my tent for exactly this purpose.
- Increase ventilation right away - Even if it's raining, open vents and create door openings on the leeward side. Some rain may enter, but airflow is essential for drying. I've learned that a little rain is better than extensive condensation soaking everything.
- Move wet gear outside - Any gear that's gotten wet needs to leave the interior. Put it in the vestibule or under a rain fly. Wet gear inside the tent creates a feedback cycle that generates more condensation.
- Create airflow if weather permits - If there's a break in the rain, open everything. I've dashed out of my tent during brief clearing to maximize ventilation windows. These short opportunities can significantly reduce moisture levels.
- Reposition your sleeping setup - If your sleeping bag is against a wet wall, move it. Create space between your body and the tent fabric. I've shifted my pad in the middle of the night to avoid contact with wet areas.
- Use body heat strategically - Your body heat can help dry wet areas if you position carefully. I've found that lightly pressing my back against wet areas (while wearing a waterproof shell) can accelerate evaporation through body warmth.
The worst thing you can do is ignore condensation and hope it improves. It won't. Moisture begets more moisture. Taking immediate action, even if it means briefly exposing yourself to the elements, prevents worse problems later. I've learned that a few minutes of proactive management saves hours of drying time later.
Seasonal Considerations
Different seasons bring unique condensation challenges. Here's what I've learned from camping year-round:
Spring camping: Rapidly changing temperatures and ground moisture from thawing create perfect condensation conditions. I ventilate aggressively in spring and pay extra attention to site selection, avoiding areas with standing water or saturated soil.
Summer camping: Warm nights reduce temperature differences, but higher humidity can still cause problems. The advantage is you can ventilate more freely without freezing. I take advantage of this by running maximum ventilation even when it doesn't seem necessary.
Fall camping: Cold nights combined with residual daytime warmth create severe condensation risk. This is when I'm most vigilant about ventilation. The dramatic temperature drop at sunset is prime condensation time, so I ensure vents are fully open before bed.
Winter camping: Extreme cold makes condensation freeze, creating ice that can damage gear and create safety issues. Ventilation remains critical even in freezing conditions. I've found that frozen condensation is actually more problematic than liquid because it's harder to manage and can coat everything in ice.
Single Wall vs Double Wall Tents
Many campers struggling with condensation consider switching to double wall designs. There are trade-offs to consider:
| Feature | Single Wall Tents | Double Wall Tents |
|---|---|---|
| Condensation Resistance | Lower - prone to moisture buildup | Higher - rain fly creates thermal buffer |
| Weight | Lighter - single layer design | Heavier - rain fly adds weight |
| Setup Speed | Faster - single piece to pitch | Slower - rain fly adds step |
| Versatility | Less adaptable in varied conditions | More adaptable - can pitch fly only |
| Best Conditions | Dry, cold environments with careful use | Wider range including wet/humid conditions |
After extensive use of both designs, I've concluded that single wall tents are absolutely worth the condensation management effort - if weight savings matters to you. For backpackers counting every ounce, the weight advantage is substantial. But if you're car camping or weight isn't critical, double wall tents offer more forgiving condensation performance.
Frequently Asked Questions
What causes condensation in single wall tents?
Condensation occurs when warm, moist air from your breath and body contacts the cooler tent fabric, causing water vapor to transform into liquid droplets. This temperature difference, combined with humidity sources inside the tent, creates ideal conditions for moisture buildup. Single wall designs lack a rain fly to create a thermal buffer, making them more susceptible than double wall tents.
How do I stop condensation in my tent?
Maximize ventilation by keeping all vents open and creating cross-drafts through partially opened doors. Position your tent to capture prevailing winds, use a ground sheet to block moisture from below, and store wet gear outside the vestibule. Never cook inside your tent, and avoid bringing unnecessary wet items inside. These strategies together can reduce condensation by 60-70% when properly implemented.
Why does my single wall tent get wet inside?
Your single wall tent gets wet inside because warm, humid air from your breathing (about 1 liter per night) and perspiration contacts the cooler fabric walls. This temperature difference causes water vapor to condense into liquid droplets, similar to how water beads on a cold soda can. Without a separate rain fly, there's no thermal barrier to prevent this moisture transfer, making single wall designs particularly prone to interior wetness.
Is condensation normal in single wall tents?
Yes, some condensation is completely normal in single wall tents and doesn't indicate a defect. A light misting or small droplets are expected, especially in cold or humid conditions. What's not normal is heavy dripping, soaking of gear, or standing water inside. Focus on management rather than complete elimination. If you're experiencing excessive condensation that soaks your sleeping bag and clothing, you need to improve ventilation and setup techniques.
How do you ventilate a single wall tent?
Ventilate a single wall tent by keeping all factory vents open continuously, partially unzipping doors to create cross-drafts, and orienting the door toward prevailing winds. Even in light rain, most vents shed water while allowing airflow. In cold conditions, increase ventilation rather than decreasing it. The goal is constant air exchange, replacing warm moist interior air with drier exterior air. Active solutions like battery-powered fans can help in still conditions.
Should I leave tent vents open in the rain?
Yes, you should keep vents open even in rain. Most tent vents are designed to shed water while allowing airflow. Closing all vents during rain actually makes condensation worse, as moisture from your breath becomes trapped inside. In light rain, keep all vents open. In heavy rain, maintain vent openings and create small door openings on the leeward side (away from rain direction). Some water may enter, but the airflow prevents worse interior moisture buildup.
The Bottom Line on Single Wall Tent Condensation
After years of camping in single wall tents across every season, here's what I've learned: condensation is manageable but never completely eliminateable. The key is developing a comprehensive approach that combines smart site selection, proper setup, aggressive ventilation, and the right tools for the job.
- 🌬️ Most Critical Strategy: Continuous ventilation - keep vents open and create cross-drafts even when it seems unnecessary. This single strategy reduces condensation more than anything else.
- 📍 Most Overlooked Factor: Campsite selection - elevated, breezy sites with good drainage make a tremendous difference. I've seen the same tent perform dramatically differently just by moving 50 feet to a better spot.
- 🛡️ Most Valuable Product: Nikwax Solarproof treatment - maintaining fabric breathability while waterproofing the exterior creates the optimal one-way moisture barrier.
- ⚡ Most Important Lesson: Take immediate action when condensation occurs. Wiping down walls and improving ventilation early prevents small problems from becoming sleeping bag-soaking disasters.
Pro Tip: Test your setup and techniques in backyard conditions before relying on them in the backcountry. I've spent many nights in my yard experimenting with ventilation configurations and learning what works. Better to figure this out at home than discover your setup fails during a storm miles from civilization.